
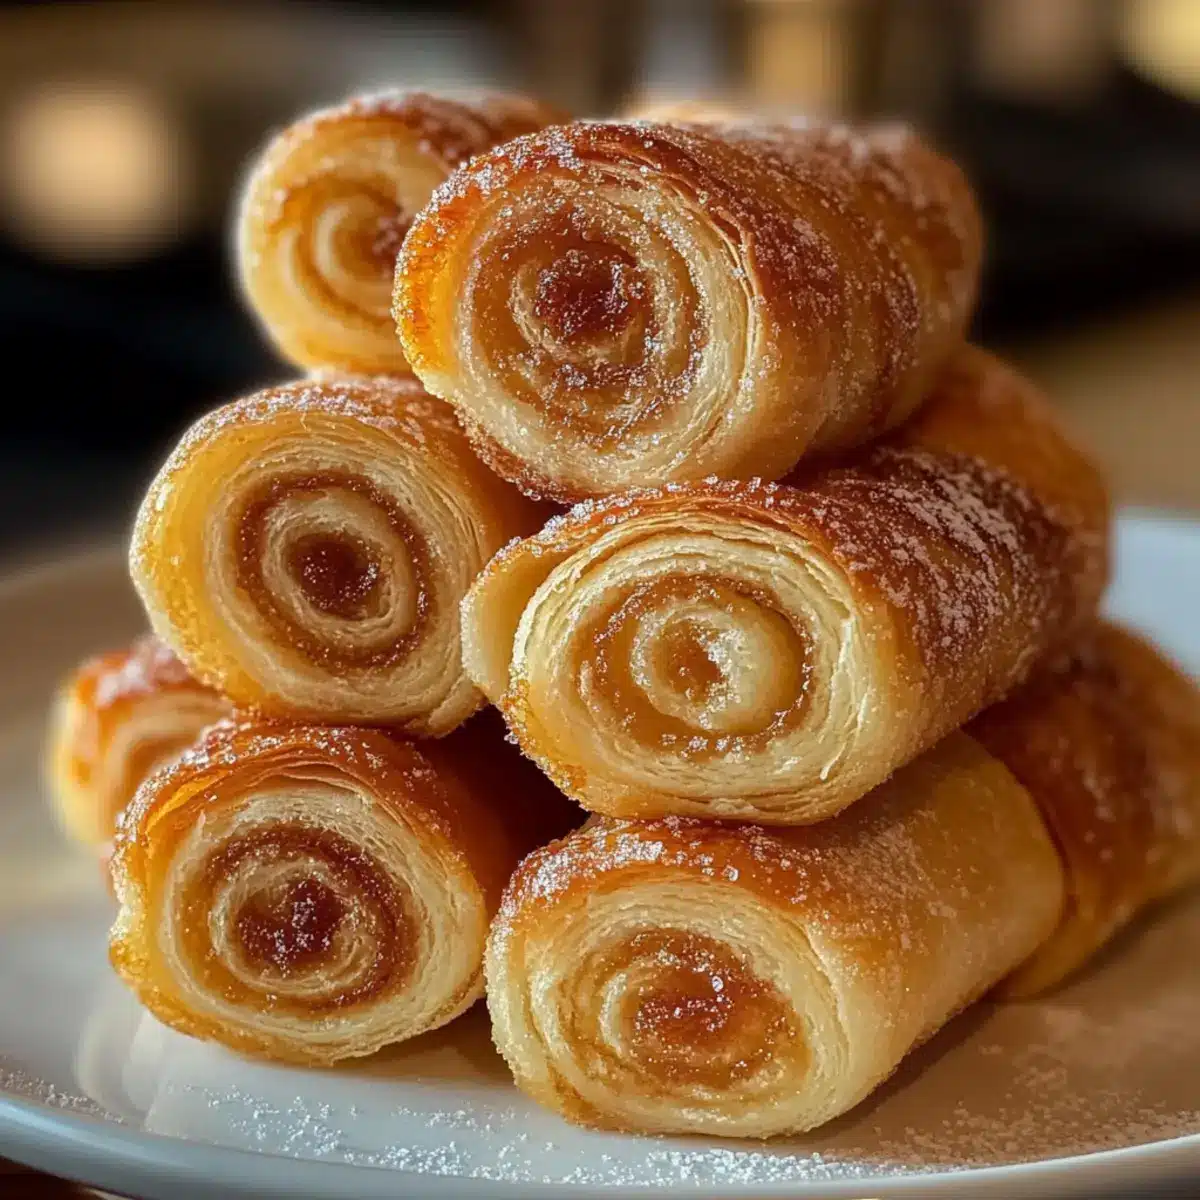
There’s something wonderfully inviting about the aroma of freshly baked Sugar Snails wafting through the kitchen, a scent that instantly transports me back to my childhood. These delightful pastries, with their soft spirals and subtle sweetness, are the perfect choice for those who enjoy a cozy brunch or a light dessert without the heaviness of frosting. What I love most about Sugar Snails is their simplicity; using just a handful of staple ingredients, they come together effortlessly, making them a great project for bakers of any skill level. Not only are they a crowd-pleaser, but they also bring a touch of warmth and nostalgia to any gathering. So, are you ready to roll up your sleeves and create some pastry magic?
Why Are Sugar Snails So Irresistible?
Irresistible pastries: Sugar snails are uniquely delightful, offering a comforting sweetness without being overly rich. Simplicity shines: With basic ingredients, you can whip up a batch in no time, perfect for both novice and experienced bakers. Versatile options: Customize your sugar snails with various fillings or glazes, making them suitable for any occasion. Crowd-pleaser: Whether at brunch or a casual gathering, these pastries are sure to impress your guests. Don’t forget to pair them with a steaming cup of coffee for the ultimate treat!
Sugar Snails Ingredients
• Get ready to bake delicious pastries!
For the Dough
- All-purpose flour – Provides structure while keeping the dough soft. Note: Avoid over-measuring; spoon and level for best results.
- Yeast – Active dry or instant works. Note: Ensure freshness for proper dough rise.
- Whole milk – Adds richness. Note: Slightly warm to activate the yeast; can substitute with 2% milk.
- Unsalted butter – Essential for flavor and texture. Note: Use softened butter for easy spreading.
- Granulated sugar – Key ingredient for a caramelized sweetness. Note: Brown sugar can be used for a richer flavor.
- Egg – Adds richness and binds the dough.
- Salt – Balances sweetness and enhances flavor. Note: Don’t skip.
For Optional Fillings
- Cinnamon – Incorporate into sugar for a spiced flavor twist.
- Vanilla bean paste – Add for a fragrant touch.
These simple ingredients combine to create the delightful Sugar Snails that everyone will love!
Step‑by‑Step Instructions for Sugar Snails
Step 1: Prepare the Dough
Begin by warming the milk in a saucepan until it’s just warm to the touch, not boiling. In a medium bowl, combine the warm milk, yeast, and a teaspoon of sugar. Stir gently and let it sit for about 5–10 minutes until it becomes frothy—this indicates the yeast is active.
Step 2: Combine Ingredients
Once the yeast mixture is frothy, add the remaining sugar, egg, melted butter, salt, and flour into the bowl. Mix these ingredients using a wooden spoon or a stand mixer fitted with a dough hook until a soft dough starts to form, about 3–5 minutes. The dough should be slightly sticky but manageable.
Step 3: Knead the Dough
Transfer the dough to a lightly floured surface and knead it by hand for about 8–10 minutes, or continue mixing in the stand mixer until the dough is smooth and elastic. To test doneness, gently poke the dough; it should spring back slightly.
Step 4: First Rise
Place your kneaded dough in a greased bowl, covering it with a clean kitchen towel or plastic wrap. Allow it to rise in a warm environment until it has doubled in size, which usually takes 1 to 1.5 hours. You’ll know it’s ready when the dough has puffed up and looks soft.
Step 5: Roll Out the Dough
After the dough has risen, punch it down to release any air bubbles. On a lightly floured surface, roll the dough into a large rectangle, approximately ¼ inch thick. Ensure the edges are even for uniformly shaped Sugar Snails.
Step 6: Add the Filling
Spread the softened butter evenly over the rolled-out dough, leaving a small margin at the edges. Sprinkle granulated sugar over the buttered surface, adding optional cinnamon if you’re in the mood for a spiced version.
Step 7: Shape the Snails
Starting from the long side of the rectangle, tightly roll the dough into a log, keeping it as even as possible. Once rolled, slice the log into even pieces, about 1 to 1.5 inches wide. You’ll see the spiral layers forming, ready to become delightful Sugar Snails.
Step 8: Second Rise
Place the sliced snails on a greased baking dish or parchment-lined tray, making sure to leave space between each one for expanding. Cover with a kitchen towel and let them rise for another 30 to 45 minutes. They should look puffy and slightly larger when ready.
Step 9: Bake
Preheat your oven to 350°F (175°C) while the snails are rising. Once risen, bake the Sugar Snails for 20–25 minutes until they turn golden brown on top. Keep an eye on them to ensure they don’t overbake; the edges should be lightly crisp while the centers remain soft.
Step 10: Cool Slightly
After baking, remove the Sugar Snails from the oven and let them cool in the pan for about 10 minutes. This resting period allows the sugar to set slightly while maintaining a warm, inviting aroma ready to be savored.
How to Store and Freeze Sugar Snails
- Room Temperature: Store freshly baked sugar snails in an airtight container at room temperature for up to 2 days to maintain their softness.
- Refrigerator: If you want to keep them longer, place sugar snails in the fridge for up to 5 days. Reheat gently in the microwave or oven to restore their warmth and texture.
- Freezer: For extended storage, freeze the baked sugar snails in a single layer on a baking sheet until firm, then transfer to a sealed bag. They can be frozen for up to 2 months. Thaw overnight in the fridge and warm before serving.
Sugar Snails Variations and Substitutions
Feel free to explore these delightful twists that can elevate your sugar snails from delicious to extraordinary!
-
Vanilla Sugar Snails: Add a splash of vanilla extract or some vanilla bean paste for that extra fragrant touch. This sweet aroma enhances the overall experience beautifully.
-
Cinnamon Sugar Snails: Mix cinnamon into the sugar before sprinkling to infuse warm, cozy flavors throughout. Perfect for those chilly mornings when you crave that cinnamon roll essence.
-
Lemon Sugar Snails: For a bright twist, incorporate fresh lemon zest into your dough or filling. The citrusy note balances out the sweetness, making it refreshingly light.
-
Nutty Sugar Snails: Top your sugar snails with finely chopped almonds or pecans for added crunch and a nutty flavor profile that complements the richness of the snails. Imagine savoring a delightful snails with a satisfying bite!
-
Glazed Sugar Snails: Whip up a simple powdered sugar glaze to drizzle on top after baking. This adds a touch of sweetness and a pretty finish that makes them irresistible on any brunch table.
-
Dairy-Free Sugar Snails: Swap whole milk for almond, oat, or soy milk and use vegan butter to make this recipe dairy-free without losing any richness. It’s a great option for those with lactose intolerance!
-
Choco-Chip Sugar Snails: Add semi-sweet chocolate chips to the filling for a decadent treat that chocolate lovers will adore. The gooey chocolate adds an exciting surprise in every bite.
-
Spicy Sugar Snails: For a kick, sprinkle a pinch of cayenne pepper with the sugar in your filling. The subtle heat pairs surprisingly well with the sweetness, much like a spicy-sweet dessert fusion!
Expert Tips for Perfect Sugar Snails
- Measure Accurately: Ensure your flour is measured correctly to avoid a dry dough. Spoon and level your flour for best results.
- Fresh Yeast: Always check your yeast for freshness. If it doesn’t froth when combined with warm milk, it may not rise properly.
- Tackiness Test: Your dough should be slightly tacky, not sticky. If it’s too sticky, add a little more flour during kneading.
- Even Slices: Use unflavored dental floss to make clean cuts when slicing the log into snails; this helps maintain their spiral shape.
- Customize Flavors: Feel free to create exciting variations of sugar snails by adding cinnamon or vanilla to the filling.
- Avoid Overbaking: Remove the pastries from the oven as soon as they turn golden brown to keep them soft and moist—a little bit of vigilance goes a long way!
What to Serve with Sugar Snails
There’s nothing quite like curling up with a warm Sugar Snail and a comforting drink—let’s elevate your sugary creation into a stunning brunch spread!
- Fresh Fruit Salad: Bright and vibrant, a mix of seasonal fruits adds a refreshing contrast to the buttery pastries, bringing a delightful pop of color and flavor.
- Scrambled Eggs: Fluffy and creamy, eggs offer a savory balance, making them the perfect partner for the sweetness of sugar snails, creating a well-rounded meal.
- Greek Yogurt Parfait: Layered with granola and berries, this parfait provides a tangy and textural contrast, enhancing the sweetness of the snails while keeping it light.
Want to treat your guests? Serve these snails on a brunch platter with these delightful accompaniments and watch them disappear!
- Maple Glazed Bacon: Savory and sweet, the crispy bacon adds a kick of flavor, rounding out the brunch experience beautifully—ideal for those who enjoy contrasting tastes.
- Creamy Mashed Potatoes: Silky and rich, these potatoes can be flavored with garlic for a savory touch that pairs unexpectedly well with sweet pastries.
- Coffee or Chai Tea: A steaming cup enhances the experience; the warmth and robust flavors of either beverage beautifully complement the softness of the sugar snails.
Make sure to indulge in a few sugar snails and treat yourself—because you deserve it!
Make Ahead Options
These Sugar Snails are perfect for meal prep, allowing you to savor fresh pastries without the last-minute rush! You can prepare the dough and shape the snails up to 24 hours in advance. Simply follow the instructions until the second rise, then cover the baking dish tightly with plastic wrap and refrigerate. When you’re ready to bake them, let the snails sit at room temperature for about 30 minutes to get them rising again before popping them in a preheated oven. This method ensures they bake up just as delightful and fluffy, maintaining that irresistible texture and flavor everyone loves. So get ready to impress your family with freshly baked Sugar Snails with minimal effort on busy mornings!
Sugar Snails Recipe FAQs
How do I choose ripe ingredients for my Sugar Snails?
Absolutely! When selecting ingredients, opt for whole milk that’s fresh and slightly warm (about 110°F) to activate the yeast effectively. For unsalted butter, ensure it’s soft enough to spread easily but not melted. If using granulated sugar, a quality brand makes a difference in sweetness.
How should I store my Sugar Snails?
Once baked, store your sugar snails in an airtight container at room temperature for up to 2 days to keep them deliciously soft. For a longer shelf life, they can be kept in the refrigerator for up to 5 days; simply reheat gently before enjoying!
Can I freeze Sugar Snails?
Yes, indeed! To freeze baked sugar snails, place them in a single layer on a baking sheet and freeze until firm. Afterward, transfer them to a sealed freezer bag and they can last up to 2 months. When you’re ready to enjoy, thaw them overnight in the fridge, then warm them in the oven for that freshly-baked taste.
What troubleshooting tips do you have for making Sugar Snails?
If your dough isn’t rising, it may be due to inactive yeast. Check the expiration date and ensure the milk was warm—not hot or cold. Should your sugar snails end up too dry, it’s often from overly measured flour—use the spoon and level method. If they seem too dense, consider kneading longer or allowing extra time for rising.
Are there any dietary considerations for Sugar Snails?
Very! If you have dietary restrictions, you can substitute whole milk with almond or soy milk for a dairy-free option. For those with gluten sensitivity, try using a gluten-free all-purpose flour blend. Always double-check for allergies to yeast, eggs, or cross-contamination if preparing for someone with food allergies.
Can Sugar Snails be made ahead of time?
The more the merrier! Yes, you can prepare sugar snails the night before. After shaping the snails, arrange them in a baking dish, cover, and refrigerate overnight. In the morning, allow them to come to room temperature and rise for about 30 minutes before baking; this way, you can enjoy freshly baked pastries that are perfect for brunch!
Sweet and Buttery Sugar Snails: A Cozy Bake for Everyone
Ingredients
Equipment
Method
- Warm the milk in a saucepan until just warm to the touch, not boiling. Combine warm milk, yeast, and a teaspoon of sugar in a medium bowl. Stir gently and let sit for 5–10 minutes until frothy.
- Once frothy, add remaining sugar, egg, melted butter, salt, and flour. Mix with a spoon or stand mixer with a dough hook until a soft dough forms, about 3–5 minutes.
- Transfer the dough to a floured surface and knead by hand for about 8–10 minutes until smooth and elastic.
- Place the kneaded dough in a greased bowl, cover it, and let rise in a warm environment until doubled in size, 1 to 1.5 hours.
- After rising, punch down the dough and roll into a large rectangle, about ¼ inch thick.
- Spread softened butter over the rolled dough, leaving a margin at the edges. Sprinkle granulated sugar over the buttered surface and add optional cinnamon.
- Starting from the long side, tightly roll the dough into a log and slice into even pieces, about 1 to 1.5 inches wide.
- Place the sliced snails on a greased baking dish, leave space for them to expand, cover, and let rise for another 30 to 45 minutes.
- Preheat the oven to 350°F (175°C). Bake the Sugar Snails for 20–25 minutes until golden brown on top.
- Remove from oven and let cool in the pan for about 10 minutes.
Leave a Reply