
“Back in the day, when family gatherings meant sweet indulgence, pistachio pudding was the star of the dessert table. This Creamy No-Bake Pistachio Pudding Dessert blends nostalgia with simplicity, delivering a delightful layered treat that’s as easy to prepare as it is to devour. Not only does it require no baking—perfect for those hot summer days—but it’s also a creamy, dreamy solution to satisfy any sweet tooth. With the option to jazz it up by adding your favorite toppings, it allows for endless creativity, making it suitable for any occasion. Curiosity piqued? Let’s dive into the recipe that brings those cherished memories to life!”
Why is this Pistachio Pudding Dessert irresistible?
Creamy Texture: The velvety pistachio layer melts in your mouth, creating a luxurious experience.
Nostalgic Appeal: This recipe brings back warm memories of family gatherings and celebrations, making it a timeless favorite.
No-Bake Convenience: You can whip this dessert up in no time, perfect for hot days when you want to avoid turning on the oven.
Endless Variations: Feel free to customize it with your favorite toppings like whipped cream or fresh fruit, making every serving unique!
Crowd-Pleasing Delight: With layers of flavor and texture, this dessert is sure to impress guests, ensuring it’ll be the highlight of your next gathering.
Experience the joy of creating this Pistachio Pudding Dessert that your loved ones will adore!
Pistachio Pudding Dessert Ingredients
For the Crust
- Butter – Adds richness to the crust; margarine can be used as a substitute if needed.
- All-Purpose Flour – Provides structure to the crust; gluten-free flour works well as an alternative.
- Chopped Nuts (e.g., walnuts or pecans) – Adds a delightful crunch to the crust; substitute with almonds for a different flavor.
For the Cream Cheese Layer
- Cream Cheese – Creates a smooth, rich texture; substitute with neufchâtel cheese for a lighter option.
- Powdered Sugar – Sweetens the cream cheese layer; granulated sugar can be a substitute, though it may yield a grainier texture.
- Cool Whip – Lightens the cream cheese layer; use homemade whipped cream for a fresher taste, ensuring it’s well-stabilized.
For the Pistachio Layer
- Instant Pistachio Pudding Mix (2 boxes) – The key flavor component that ensures a rich pistachio taste; do not substitute with cook-and-serve pudding.
- Milk – Activates the pudding mix; any milk, whether dairy or plant-based, can be used for a creamy finish.
Get ready to savor this delicious Pistachio Pudding Dessert — it’s a sweet spot in the hearts of many!
Step‑by‑Step Instructions for Creamy No-Bake Pistachio Pudding Dessert
Step 1: Prepare the Crust
Begin by preheating your oven to 350°F (175°C). In a mixing bowl, melt 1/2 cup of butter and combine it with 1 cup of all-purpose flour and 1 cup of chopped nuts until the mixture resembles coarse crumbs. Pour this sandy mixture into a greased 9×13” pan and press it evenly across the bottom to form the crust.
Step 2: Bake the Crust
Place the prepared crust in the preheated oven and bake for 20 minutes or until it turns lightly golden. You’ll know it’s ready when it emits a buttery aroma and the edges start to darken slightly. Once done, remove it from the oven and let it cool completely in the pan while you prepare the next layer.
Step 3: Make the Cream Cheese Layer
In a large mixing bowl, use an electric mixer to beat together 8 ounces of softened cream cheese and 1 cup of powdered sugar until smooth and creamy. Gently fold in 1 cup of Cool Whip until fully incorporated. Spread this luscious cream cheese mixture evenly over the cooled crust, ensuring it reaches all the corners for a delightful first layer.
Step 4: Prepare the Pudding Layer
In another bowl, whisk together two boxes of instant pistachio pudding mix with 4 cups of milk. Continue whisking for about 2 minutes until the mixture thickens significantly and gets a rich, creamy consistency. Carefully pour the pudding layer over the cream cheese layer, spreading it with a spatula for an even layer of vibrant pistachio goodness.
Step 5: Final Layer
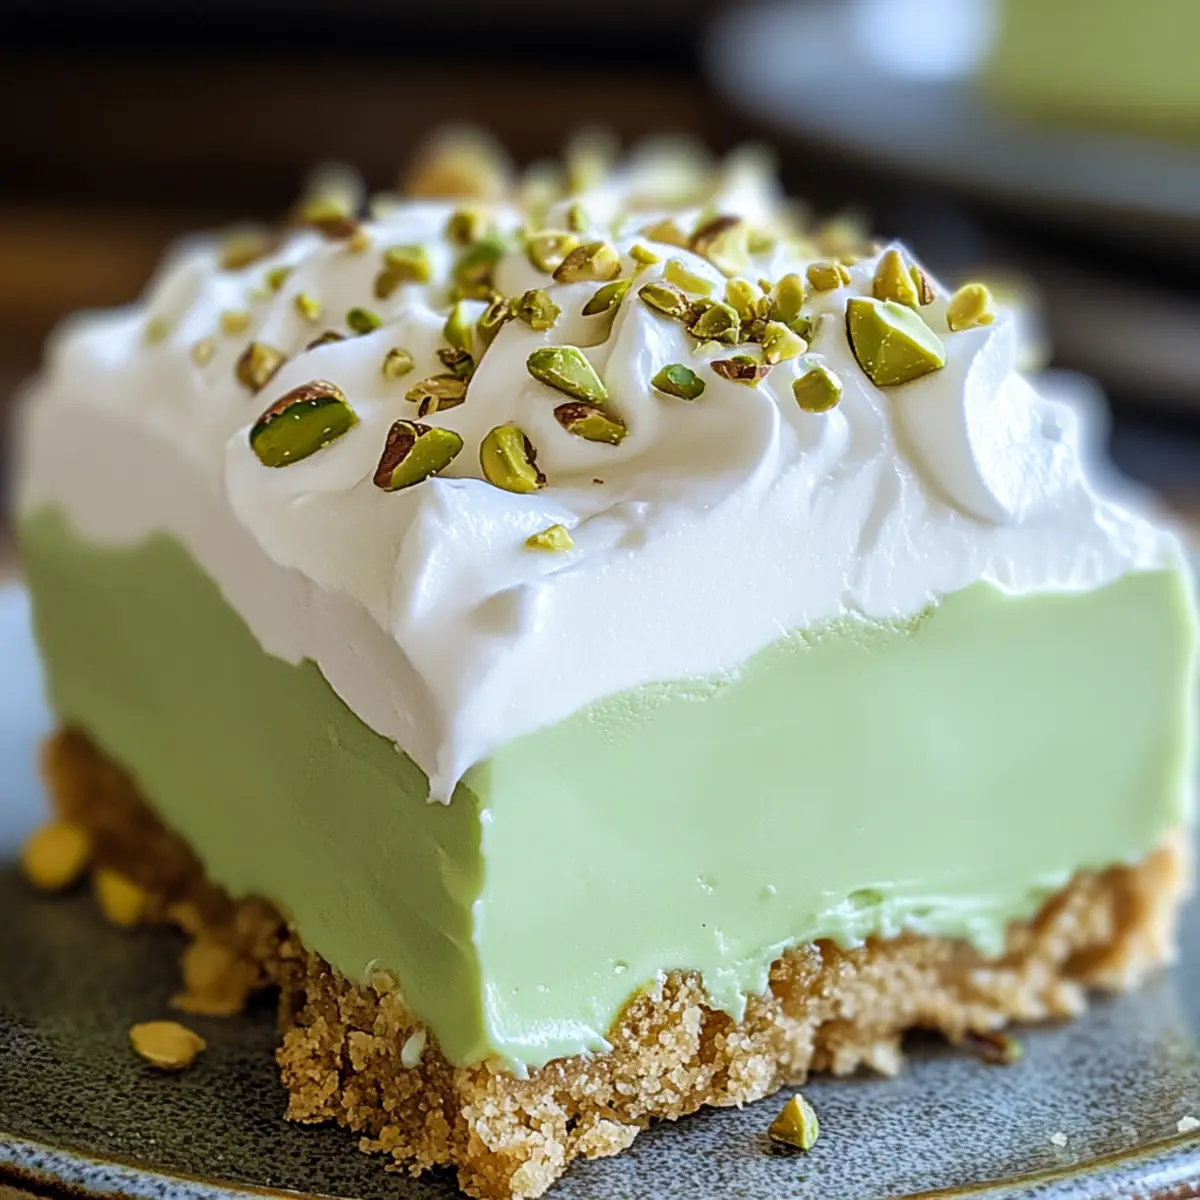
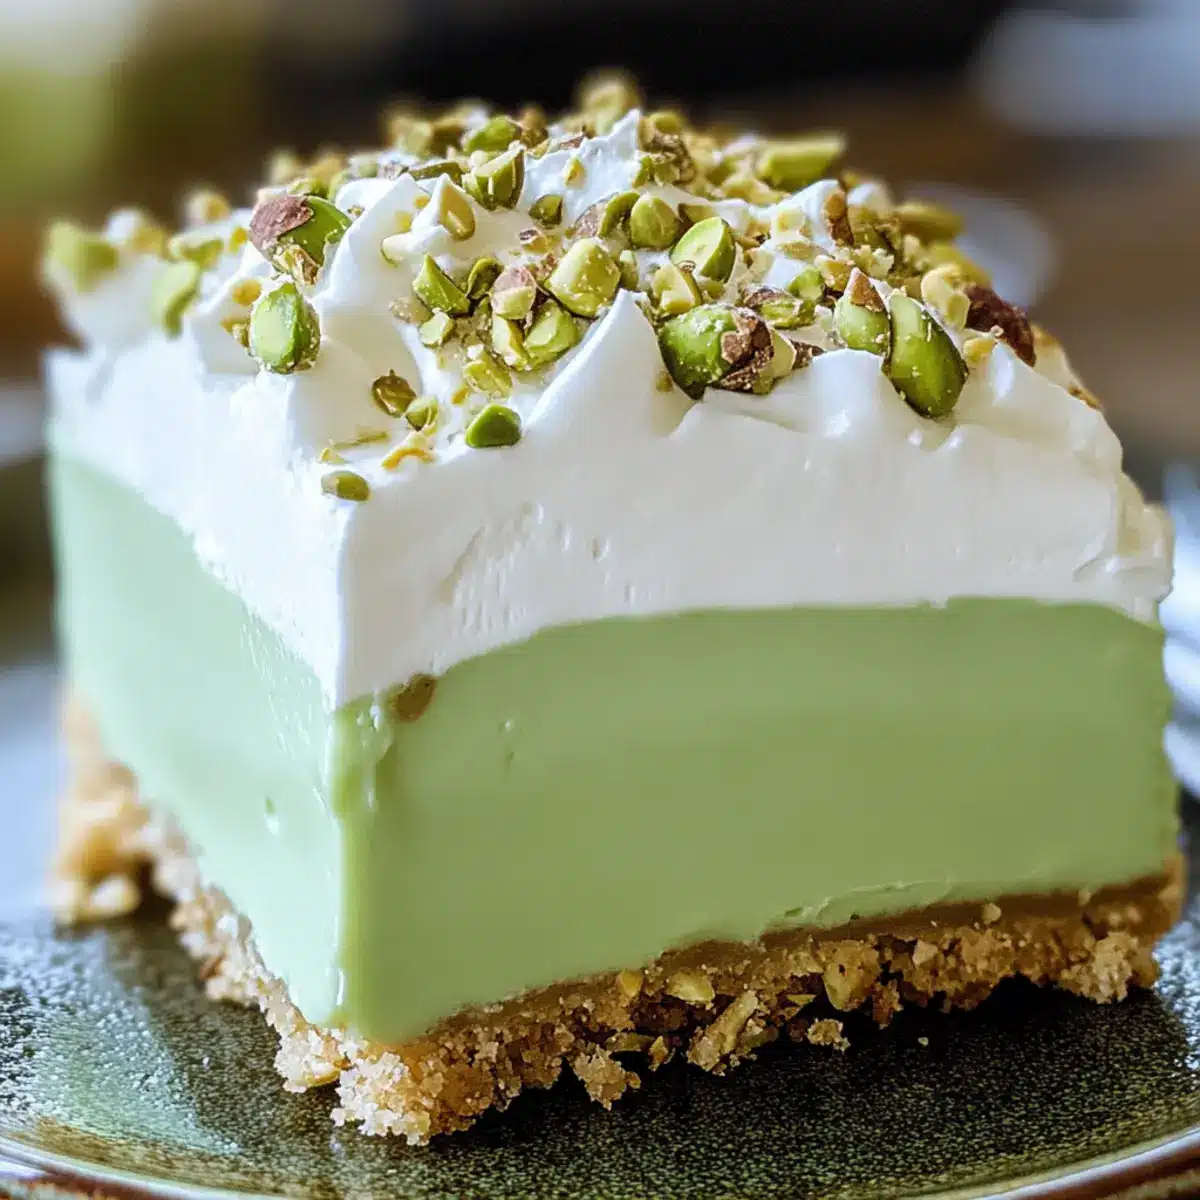
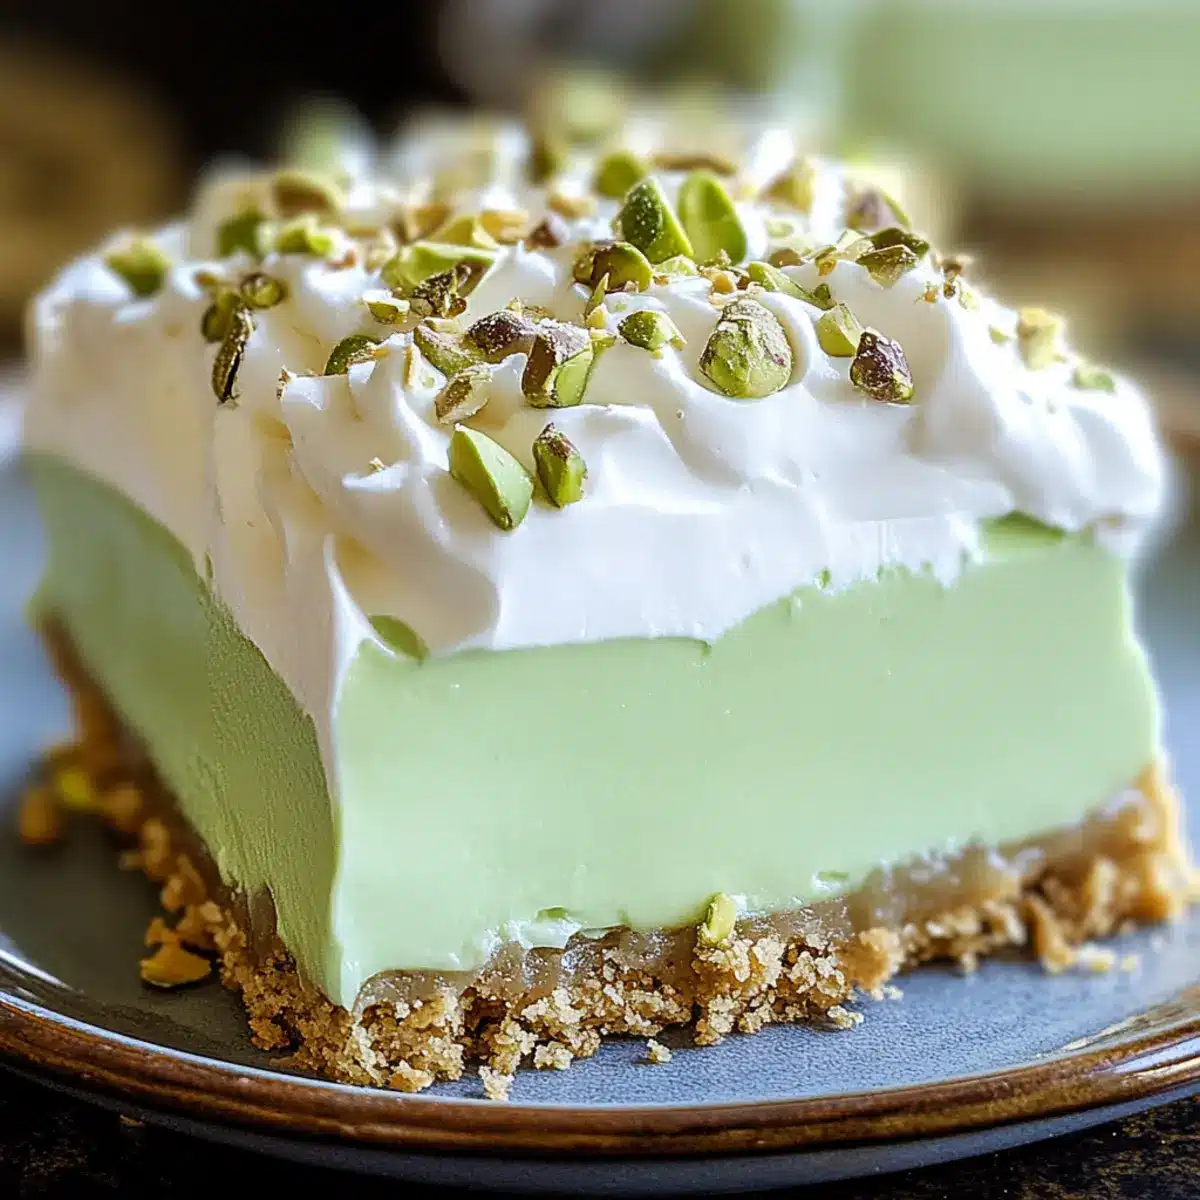
Once the pudding layer is set, top it with the remaining 2 cups of Cool Whip, spreading it smoothly over the pistachio pudding. For an added crunch, sprinkle with extra chopped nuts or even crushed pistachios on top to enhance the visual appeal and texture of your delicious Pistachio Pudding Dessert.
Step 6: Chill
Cover the dessert with plastic wrap and refrigerate for at least 2 hours, allowing the layers to set and meld together beautifully. Chilling is crucial for achieving that perfect slice later. If you have the time, letting it sit overnight creates even more intense flavors and delightful creaminess.
Pistachio Pudding Dessert Variations
Feel free to indulge your creativity as you personalize this delicious dessert!
-
Nut-Free: Omit the nuts in the crust and topping, using a simple blend of crushed graham crackers or cookies for a delightful base. A smooth biscuit texture can be just as satisfying!
-
Vegan Delight: Replace cream cheese with a vegan cream cheese alternative and use coconut whipped cream instead of Cool Whip for a plant-based version that’s equally creamy and indulgent.
-
Flavor Infusion: Add a splash of almond extract to the pudding layer for an aromatic twist. A hint of almond complements the pistachio beautifully.
-
Fruit Topper: Try layering fresh fruits like sliced strawberries or blueberries on top of the cream layer for a fresh, fruity contrast to the creamy pudding.
-
Chocolate Drizzle: Elevate your dessert with a drizzle of chocolate sauce over the Cool Whip before serving. The richness pairs perfectly with the nutty pistachio flavor.
-
Caramel Layer: Add a layer of caramel sauce on top of the cream cheese layer before pouring in the pudding. The sweet and salty elements create a divine combination.
-
Coconut Crunch: Incorporate flaked coconut into the crust to add a tropical flair. It will give a hint of tropical bliss that works wonderfully with the pistachio.
-
Spicy Heat: For a surprising kick, sprinkle cayenne pepper or red pepper flakes on the top layer before adding nuts. The heat beautifully contrasts with the sweetness of the pudding.
Each of these embellishments brings a unique twist to the beloved pistachio pudding dessert, ensuring that every version is a delightful surprise at your gatherings! Enjoy exploring the possibilities!
Make Ahead Options
This Creamy No-Bake Pistachio Pudding Dessert is a dream for busy home cooks looking to save time! You can prepare the crust and cream cheese layer up to 24 hours in advance and store them separately in the refrigerator to maintain their textures—simply cover them tightly with plastic wrap. For the pudding layer, mix it just before serving to prevent it from losing its ideal consistency, then layer and chill the assembled dessert for at least 2 hours (or overnight for enhanced flavors). This way, your delicious Pistachio Pudding Dessert will remain just as delightful, allowing you to enjoy quality family time without the last-minute rush!
How to Store and Freeze Pistachio Pudding Dessert
Fridge: Store covered in the refrigerator for up to 3 days to keep the flavors fresh and the layers intact. Ensure it’s tightly sealed to maintain texture.
Freezer: For longer storage, you can freeze individual slices wrapped tightly in plastic wrap and foil for up to 2 months. Thaw in the fridge before serving.
Reheating: No need to reheat this dessert, as it’s best enjoyed chilled. Enjoy directly from the fridge after thawing for an optimal experience!
Serving Tips: If you freeze portions, you may want to add fresh toppings like whipped cream or nuts after thawing to refresh the presentation of your Pistachio Pudding Dessert.
What to Serve with Creamy No-Bake Pistachio Pudding Dessert
The perfect accompaniment can elevate your delightful layers, turning a simple dessert into a memorable feast.
-
Fluffy Whipped Cream: Adds a light, airy topping that contrasts beautifully with the creaminess of the pudding. It’s an elegant finishing touch!
-
Fresh Berries: Strawberries or raspberries provide a tart burst that balances the rich flavors, adding a refreshing pop of color.
-
Chocolate Shavings: These bring a touch of indulgence and a hint of bitterness, creating a perfect harmony with the sweet pistachio.
-
Coffee or Espresso: A warm cup perfectly contrasts the cold dessert, enhancing the flavors while providing a cozy vibe.
-
Crispy Biscotti: These crunchy cookies add a delightful texture, perfect for dipping into the creamy layers of the pudding.
-
Nutty Granola: A sprinkle of granola can add both a crunchy texture and a nutty flavor, harmonizing with the pistachio essence.
-
Ice Cream: A scoop of vanilla or chocolate ice cream next to your pudding creates a luxurious pairing that satisfies all cravings!
Enjoy crafting a beautiful dessert spread that guests will adore!
Expert Tips for the Best Pistachio Pudding Dessert
-
Crust Magic: Let the crust cool completely before adding layers to prevent sogginess; this ensures a delightful crunch.
-
Pudding Perfection: Use only instant pudding mix for this recipe; cook-and-serve won’t achieve the same creamy texture you’ll love.
-
Chill Time: For the best flavor, make this Pistachio Pudding Dessert one day ahead; the flavors intensify and meld beautifully overnight.
-
Thickening Tip: If your pudding layer appears runny, double-check your milk-to-pudding mix ratio; following the instructions closely is essential.
-
Topping Delight: Don’t shy away from adding creative toppings like caramel or fresh fruit to elevate your dessert’s flavor and presentation.
Pistachio Pudding Dessert Recipe FAQs
What’s the best way to choose ripe ingredients for this recipe?
Absolutely! For the best flavor in your Pistachio Pudding Dessert, always choose fresh ingredients. Opt for nuts that are crunchy and fragrant—if they smell off, they might be stale. As for the cream cheese, ensure it’s not nearing its expiration date for a smooth texture.
How should I store the Pistachio Pudding Dessert?
Very! Store your covered Pistachio Pudding Dessert in the refrigerator, where it will stay fresh for up to 3 days. Keeping it well-sealed is crucial to maintain the creamy texture and layered appeal. If you notice any separation or dark spots on the topping, it may be time to toss it.
Can I freeze the Pistachio Pudding Dessert?
Absolutely! For those sweet-toothed moments later, you can freeze individual slices of the Pistachio Pudding Dessert. Wrap each slice tightly in plastic wrap and then foil to prevent freezer burn. These will last for up to 2 months. When you’re ready to enjoy, simply thaw in the refrigerator overnight—easy peasy!
What should I do if my pudding layer is runny?
Oh no! A runny pudding layer can happen if the milk-to-pudding mix ratio is off. Make sure to use exactly 4 cups of milk for the two boxes of instant pudding. If it’s already runny, try to gently whisk it again and let it sit for 5-10 minutes to thicken further; if it’s still not firm, it may need to be reserved for another dessert idea rather than a layered experience.
Are there any dietary considerations I should keep in mind?
The more the merrier! If anyone is allergic to nuts, feel free to substitute the nuts in the crust with seeds like pumpkin seeds or even leave them out altogether. Additionally, this dessert can be modified to fit lactose-free diets by using plant-based cream cheese and whipped toppings. Just ensure that the pudding mix you select aligns with any dietary preferences!

Layered Pistachio Pudding Dessert to Delight Your Taste Buds
Ingredients
Equipment
Method
- Begin by preheating your oven to 350°F (175°C). In a mixing bowl, melt 1/2 cup of butter and combine it with 1 cup of all-purpose flour and 1 cup of chopped nuts until the mixture resembles coarse crumbs. Pour this sandy mixture into a greased 9x13” pan and press it evenly across the bottom to form the crust.
- Place the prepared crust in the preheated oven and bake for 20 minutes or until it turns lightly golden. Once done, remove it from the oven and let it cool completely in the pan while you prepare the next layer.
- In a large mixing bowl, use an electric mixer to beat together 8 ounces of softened cream cheese and 1 cup of powdered sugar until smooth and creamy. Gently fold in 1 cup of Cool Whip until fully incorporated. Spread this mixture evenly over the cooled crust.
- In another bowl, whisk together two boxes of instant pistachio pudding mix with 4 cups of milk for about 2 minutes until thick and creamy. Carefully pour the pudding layer over the cream cheese layer.
- Once the pudding layer is set, top it with the remaining 2 cups of Cool Whip, spreading it smoothly. Sprinkle with extra chopped nuts or crushed pistachios.
- Cover the dessert with plastic wrap and refrigerate for at least 2 hours. Chilling is crucial for achieving that perfect slice later.
Leave a Reply