
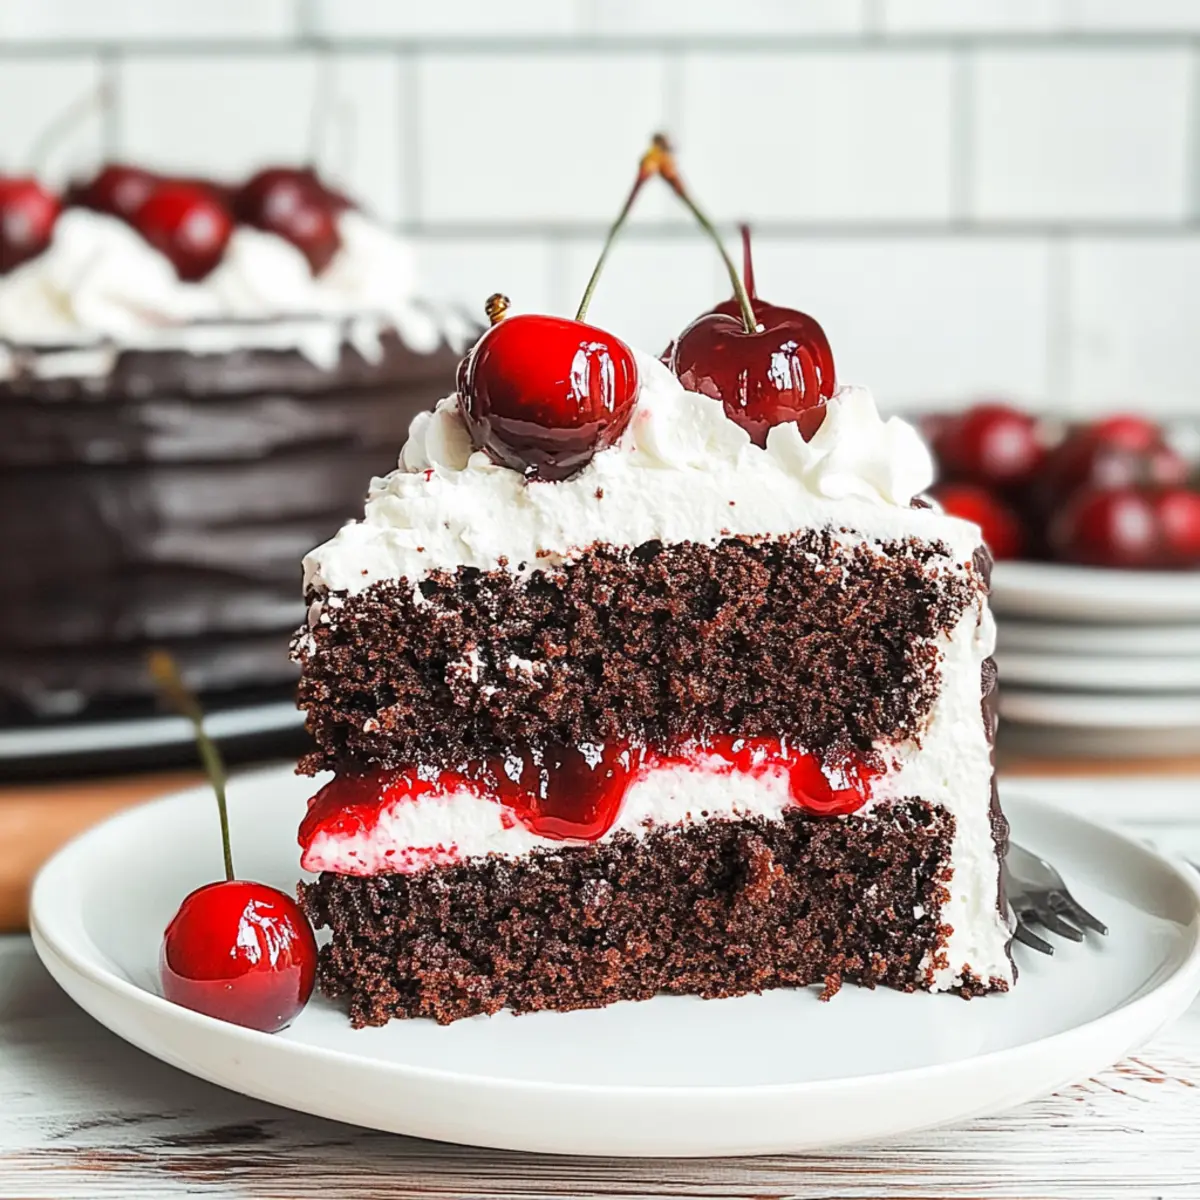
As I stood in my kitchen, I couldn’t help but feel a wave of nostalgia wash over me, recalling my first experience with Black Forest Cake. This iconic German dessert always captivates with its rich chocolate layers and delightful cherry filling. Today, I’m excited to share my version of this Classic Black Forest Cake with Homemade Cherry Filling, one that balances indulgence with a touch of homemade charm. Not only is this cake a stunning centerpiece for any gathering, but it also offers the comfort of your own kitchen and the satisfaction of impressing your loved ones. Made with moist chocolate sponge cake, juicy tart cherries, and fluffy whipped cream, every bite is nothing short of divine. Curious about how to bring this masterpiece to your table? Let’s dive in!
Why Is This Cake a Must-Try?
Irresistibly Moist: This Black Forest Cake is remarkably moist, thanks to the perfect blend of homemade cherry filling and rich chocolate layers.
Nostalgic Charm: Channeling the classic flavors of Germany, each bite evokes fond memories, making it ideal for special occasions or family gatherings.
Versatile Serving: Serve this cake chilled, topped with fluffy whipped cream and garnished with fresh cherries for an eye-catching dessert that appeals to all ages.
Time-Saving Option: Make the components ahead of time, allowing for easy assembly on the day of your celebration. For a quicker dessert, consider using Maple Bacon Pancake or No-Bake Cheesecake for simpler treats that still impress.
Crowd-Pleaser: It’s a showstopper that guarantees applause, making it the perfect choice when you want to wow your guests!
Black Forest Cake Ingredients
For the Chocolate Cake
• All Purpose Flour – Provides structure to the cake; opt for a gluten-free blend for a gluten-free take.
• Dutch Processed Cocoa Powder – Adds a rich chocolate flavor; unsweetened cocoa can be a substitute if you prefer a lighter taste.
• Baking Powder & Baking Soda – Essential leavening agents for rising; do not substitute without adjusting other ingredients.
• Salt – Enhances flavor and balances sweetness; crucial for a well-rounded taste.
• Buttermilk – Adds moisture and a tangy note; substitute with sour cream or yogurt if needed.
• Vegetable Oil – Contributes to moisture and tenderness; can be replaced with melted butter or coconut oil.
• Granulated Sugar – Sweetens the cake and contributes to a tender crumb; using brown sugar can add a touch of caramel flavor.
• Eggs & Egg Whites – Key for richness and structure; ensure they are at room temperature for optimal mixing.
For the Cherry Filling
• Tart Cherries – The star ingredient for that sweet-tart cherry filling; use frozen or canned cherries, avoiding pie filling.
• Butter – Imparts richness to the filling; opt for unsalted butter to better control sweetness.
• Almond Extract – Lifts the cherry filling’s flavor; can be omitted if desired.
For the Whipped Cream
• Heavy Whipping Cream – Essential for a luscious topping; can be stabilized with powdered sugar for better texture.
• Powdered Sugar – Sweetens the whipped cream; adjust the amount to suit your taste.
For Decoration
• Bittersweet Baking Chocolate – Perfect for creating decorative chocolate shavings on top; semi-sweet can be used as an alternative.
• Fresh Cherries – A delightful garnish; include only if available for that extra pop of color.
Step‑by‑Step Instructions for Black Forest Cake
Step 1: Preheat the Oven
Begin by preheating your oven to 350°F (175°C). While the oven is warming up, prepare two 8-inch round cake pans. Line the bottoms with parchment paper and lightly grease the sides with cooking spray to ensure easy removal of the cakes once baked. This initial step sets the stage for a perfectly baked Black Forest Cake.
Step 2: Combine Dry Ingredients
In a large mixing bowl, sift together 2 cups of all-purpose flour, ¾ cup of Dutch-processed cocoa powder, 1 teaspoon of baking powder, 1 teaspoon of baking soda, and ½ teaspoon of salt. Whisk them thoroughly to combine and to aerate the mixture. Setting these dry ingredients aside will create the structured foundation for your chocolate sponge layers.
Step 3: Mix Wet Ingredients
In a separate bowl, whisk together 1 cup of buttermilk, 1 teaspoon of vanilla extract, and 1 teaspoon of optional instant coffee granules until well blended. This mixture will add moisture and enhance the chocolate flavor in the cake. Set the wet ingredients aside while you prepare the batter for the Black Forest Cake.
Step 4: Create the Cake Batter
In a large mixing bowl, combine ½ cup of vegetable oil and 1 cup of granulated sugar. Beat the mixture until it’s light and fluffy, which should take about 2 minutes. Add 3 large eggs one at a time, mixing well after each addition. Gradually alternate adding the dry ingredients and the wet mixture, finishing with the dry, to form a smooth and rich chocolate batter.
Step 5: Bake the Cakes
Divide the batter evenly between the two prepared pans. Place them in the preheated oven and bake for 28 to 35 minutes. You’ll know they are done when a toothpick inserted in the center comes out clean or with a few moist crumbs. Enjoy the wonderful aroma filling your kitchen as the Black Forest Cake layers bake to perfection.
Step 6: Cool the Cakes
Once baked, remove the cakes from the oven and let them cool in the pans for 15 to 20 minutes. Afterward, gently invert the cakes onto wire racks to cool completely. This cooling process is crucial as it prevents the cakes from becoming soggy, allowing for a deliciously light texture in the finished Black Forest Cake.
Step 7: Prepare the Cherry Filling
In a saucepan, combine 2 cups of tart cherries (fresh, frozen, or canned), ¾ cup of sugar, and 2 tablespoons of cornstarch. Cook over medium heat, stirring constantly, until the mixture thickens and bubbles, about 8-10 minutes. Remove from heat and stir in 2 tablespoons of butter and ½ teaspoon of almond extract. Set aside to cool; this sweet-tart cherry filling will beautifully complement the chocolate layers.
Step 8: Whip the Cream
In a large mixing bowl, pour 2 cups of heavy whipping cream. Add ¼ cup of powdered sugar and 1 teaspoon of vanilla extract. Using an electric mixer, whip on medium-high speed until stiff peaks form, which should take about 3-5 minutes. Cover and refrigerate the whipped cream until you’re ready to assemble your delicious Black Forest Cake.
Step 9: Layer the Cakes
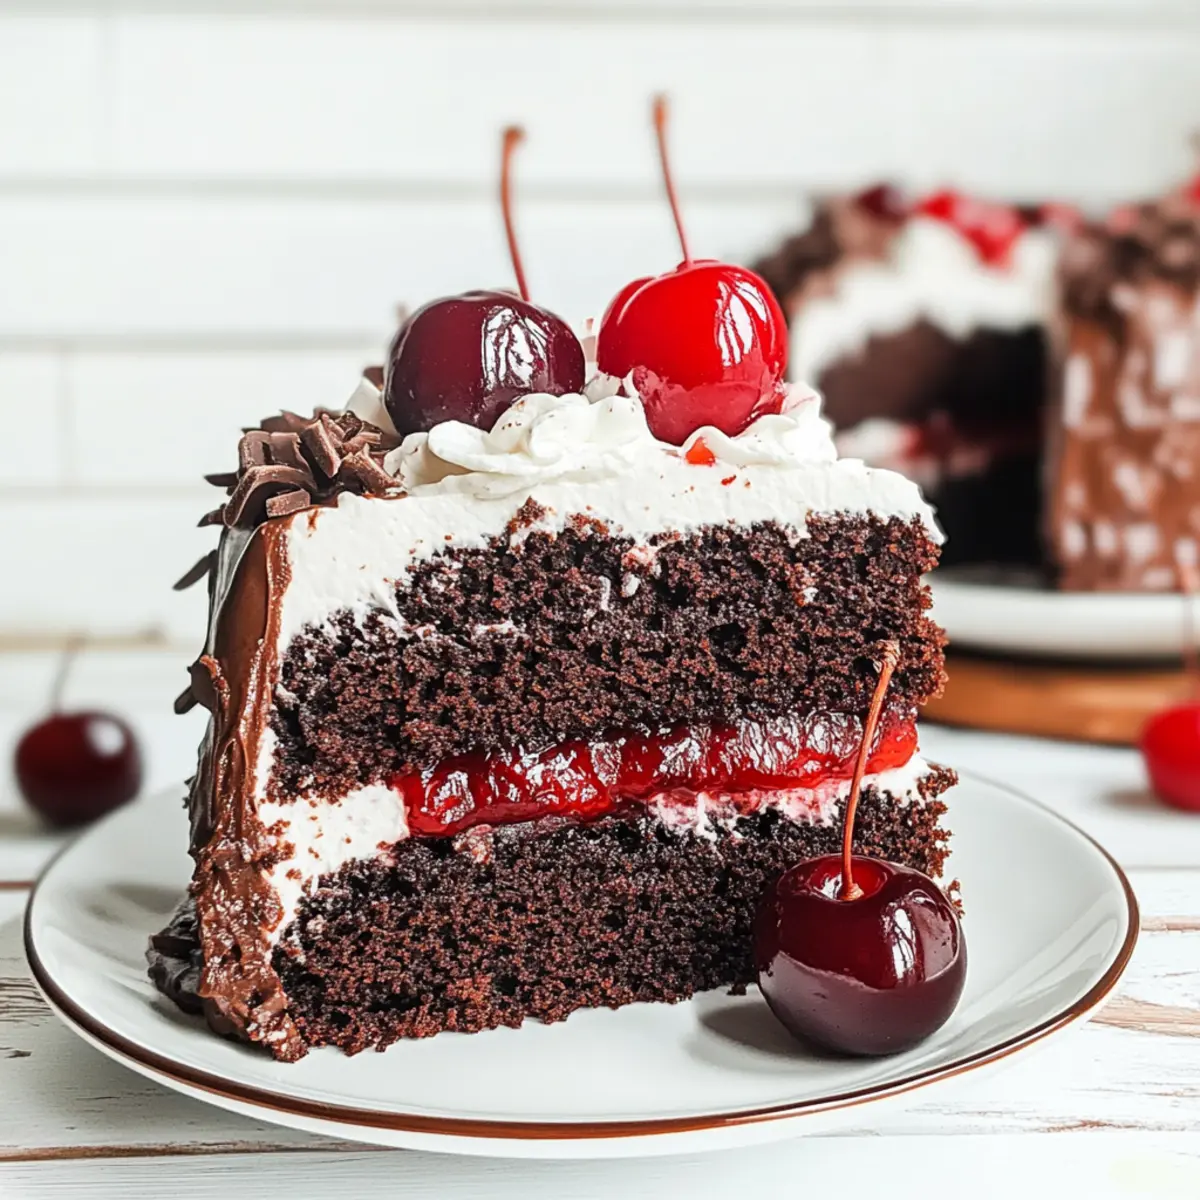
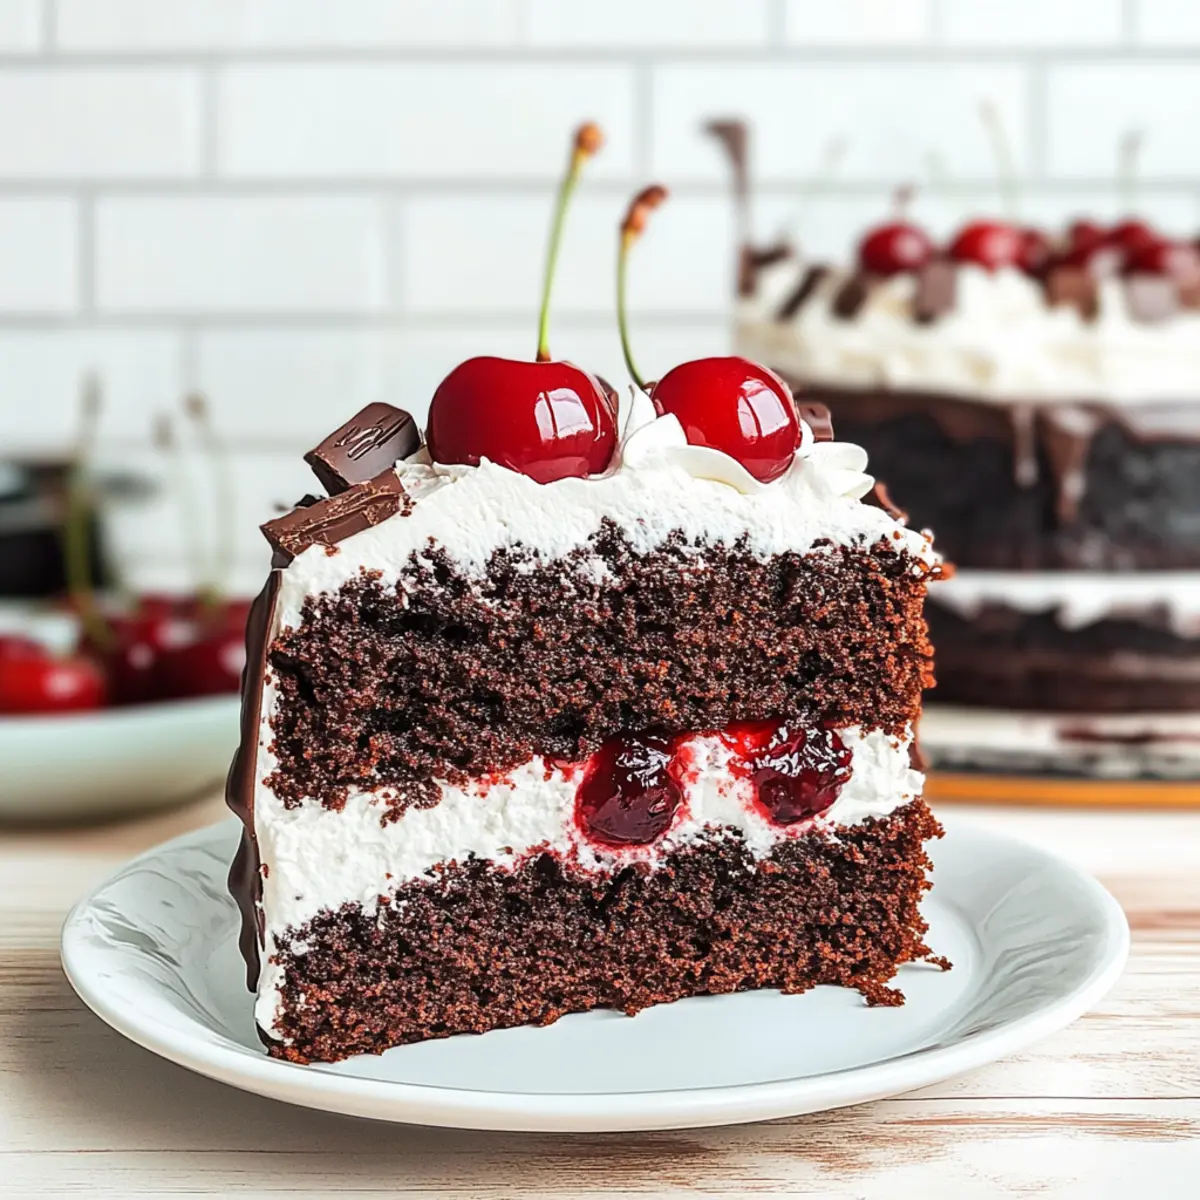
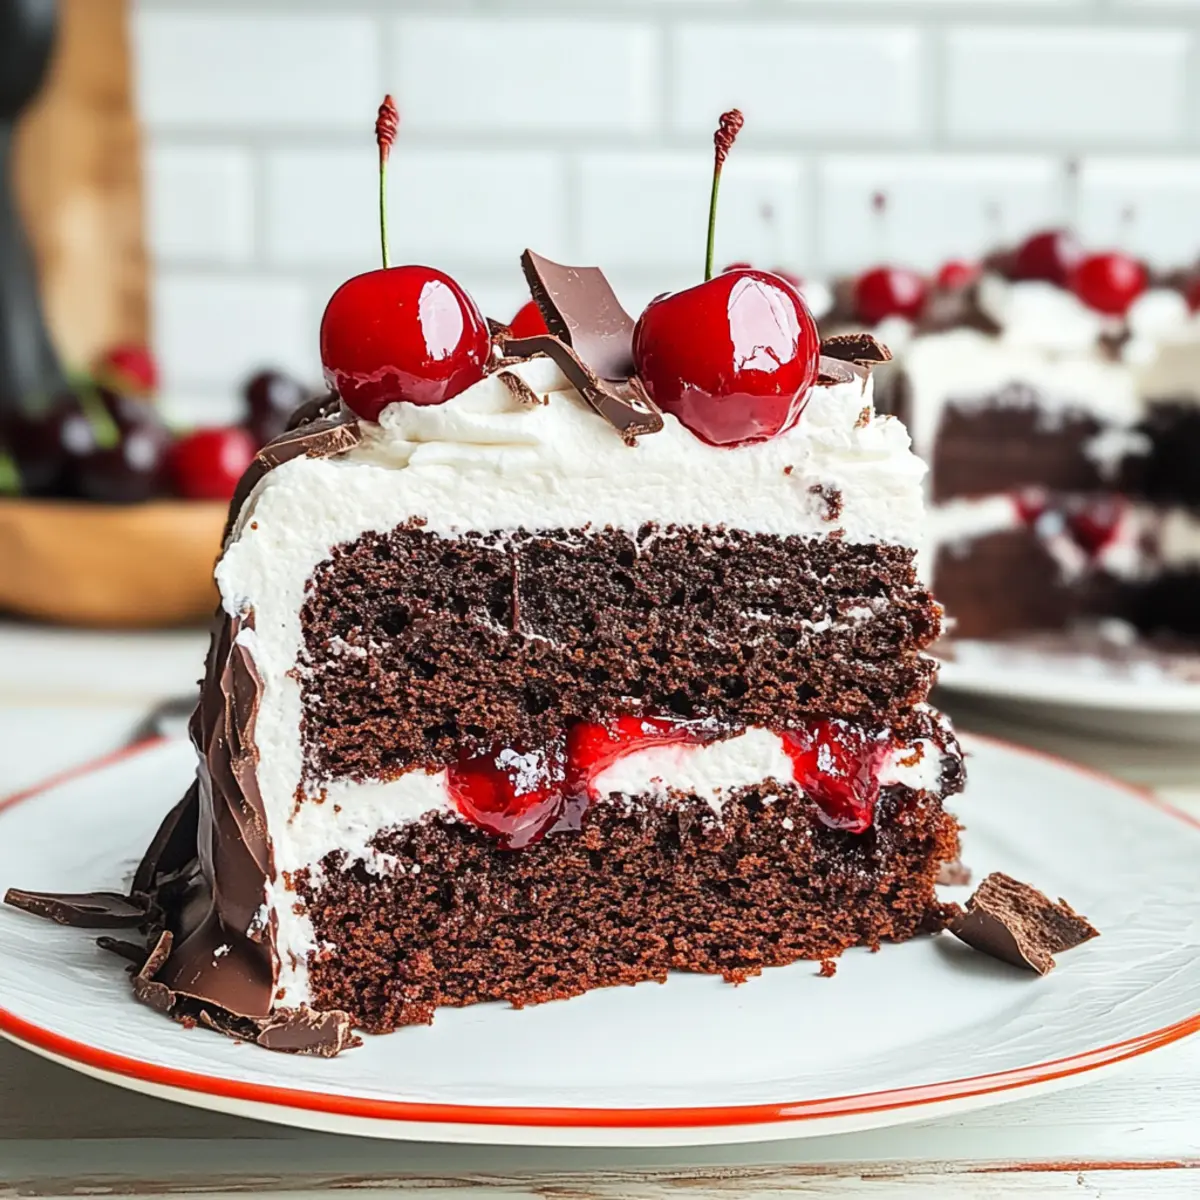
When the cakes are completely cool, carefully slice each layer in half horizontally to create four thin layers. Start with one layer, placing it on a serving platter. Drizzle with chocolate syrup, generously spread a layer of cherry filling, and top with whipped cream. Repeat this process for the remaining layers, stacking them carefully for maximum impact.
Step 10: Decorate the Cake
To finish, spread the whipped cream evenly over the top and sides of the Black Forest Cake. For a touch of elegance, garnish with chocolate shavings made from bittersweet baking chocolate and a few fresh cherries. This final step not only enhances the appearance but adds exquisite flavor to your stunning dessert masterpiece.
How to Store and Freeze Black Forest Cake
Fridge: Store leftover Black Forest Cake in the refrigerator for up to 2 days, covered in plastic wrap or an airtight container to keep it fresh and moist.
Freezer: You can freeze individual slices for up to 2 months. Wrap each slice tightly in plastic wrap and then in aluminum foil to prevent freezer burn.
Assembly: If you’ve assembled the cake, it’s best enjoyed fresh, but you can freeze it for up to a month if needed. Just make sure to wrap it well.
Thawing: To enjoy, thaw frozen slices in the refrigerator overnight before serving for the best texture and flavor.
Make Ahead Options
This Classic Black Forest Cake is ideal for meal prep, allowing you to enjoy its rich flavors without the rush. You can bake the chocolate cake layers up to 24 hours in advance, ensuring they are completely cooled before wrapping them tightly in plastic wrap to maintain moisture. The cherry filling can be prepared up to 3 days ahead and refrigerated; just allow it to come to room temperature before using. To streamline your assembly, whip the cream and refrigerate it overnight, ensuring it stays fluffy. When you’re ready to serve, simply layer the components together and enjoy a show-stopping dessert that’s just as delicious as if it were freshly made!
What to Serve with Classic Black Forest Cake?
Indulging in a slice of this delightful cake is just the beginning; let’s elevate your dessert experience with perfect pairings!
- Vanilla Ice Cream: The classic combo of warm cake and cold ice cream creates a sensational melt-in-your-mouth experience.
- Fresh Berries: A mix of strawberries and raspberries adds a tart contrast that balances the rich sweetness of the cake beautifully.
- Espresso Coffee: The robust flavor of coffee enhances the chocolate richness, making each bite even more decadent.
- Chocolate-Covered Cherries: Reinforce the cherry flavor with these sweet bites; they make for a festive and delightful addition to your dessert table.
- Whipped Cream Topping: Extra dollops of freshly whipped cream can be served on the side, allowing guests to customize their servings.
- Port or Dessert Wine: A glass of rich port wine complements the chocolate notes, creating a sophisticated finish to your meal.
- Cherry Sauce: Drizzling a homemade cherry sauce over each slice will amplify the layers of flavor while adding a vibrant splash of color.
- Nutty Biscotti: Serve buttery almond biscotti alongside for a crunchy texture that contrasts deliciously with the soft, moist cake.
- Chocolate Milkshake: For a fun twist, pair your cake with a creamy chocolate milkshake that mirrors the cake’s richness and indulgence.
Black Forest Cake Variations
Feel free to explore these fun variations, making this classic cake your own delight!
- Sweet Cherries: Swap tart cherries for sweet cherries for a gentler fruit flavor that still shines.
- Coffee Kick: Add a shot of espresso to the whipped cream for a mocha twist that elevates the chocolate flavor.
- Dairy-Free: Use coconut cream and dairy-free chocolate for a luscious vegan option that everyone can enjoy.
- Nutty Flavor: Mix in finely chopped hazelnuts into the layers for a delightful crunch and nutty richness.
- Alcohol Bonus: Incorporate a splash of kirsch (cherry schnapps) into the cherry filling for an adult twist that adds depth.
- Chocolate Ganache: Instead of whipped cream, cover the cake with a rich chocolate ganache for an indulgent touch.
- Berry Medley: Complement the cherries by adding layers of raspberries or strawberries for an exciting burst of flavor in every bite.
- Layered Delight: For a more decadent approach, alternate layers of cake with cherry filling and chocolate mousse.
Don’t forget, if you’re looking for other sweet options, you might consider trying out the delightful Carrot Cake Overnight or the scrumptious Blackened Shrimp Stroganoff for a balance of sweet and savory in your dessert repertoire!
Expert Tips for Black Forest Cake
• Choose Quality Ingredients: Use high-quality cocoa powder and fresh cherries for the best flavor; avoid pie filling, as it can be too sweet and artificial.
• Temperature Matters: Make sure eggs and buttermilk are at room temperature to ensure better mixing and a lighter cake texture.
• Cake Cooling: Let your cakes cool completely before layering; this prevents the whipped cream from melting and helps maintain structure during assembly.
• Whipped Cream Stability: Stabilize your whipped cream with a bit of powdered sugar or instant gelatin if you’re in a warm climate, ensuring it holds up well in the layers.
• Layering Technique: When stacking layers, ensure even spread of cherry filling and whipped cream to avoid bulges; it will result in a more aesthetically pleasing cake.
• Slicing Perfectly: Use a serrated knife for slicing the cakes; this will give you clean edges and make it easier to layer without crumbling.
Black Forest Cake Recipe FAQs
How do I choose the best cherries for the filling?
Selecting the right cherries is crucial for that authentic flavor in your Black Forest Cake. Look for tart cherries, whether fresh, frozen, or canned. If using fresh cherries, they should be firm and brightly colored, without any dark spots or blemishes. For frozen cherries, ensure they are pitted and not in syrup. Avoid canned pie filling, as it often has added sugars and preservatives that will alter the taste of your filling.
What’s the best way to store leftover cake?
To keep your Black Forest Cake fresh, simply store any leftovers in the refrigerator for up to 2 days. Wrap the cake in plastic wrap or place it in an airtight container. This will help maintain moisture and flavor. If you need to store it longer, consider freezing it (details below) to lock in that deliciousness for a later treat!
Can I freeze Black Forest Cake?
Absolutely! Freezing your Black Forest Cake is a great way to preserve its delightful taste. If it’s a fully assembled cake, I recommend freezing it uncovered for 1 to 2 hours first to set the whipped cream. Once it’s firm, wrap it tightly in plastic wrap followed by aluminum foil. You can store it in the freezer for up to a month. For individual slices, wrap each slice well and store them in a freezer bag; they’ll be good for up to 2 months!
What if my cake layers crumble when slicing?
Crumbling is often due to not cooling the cakes completely before slicing or if the cake is too warm. Make sure to let your cakes cool completely on wire racks before attempting to slice them. If crumbles do happen, don’t sweat it! You can always use crumbs as a decorative topping or layer them back together with additional cherry filling and whipped cream to create a rustic look.
Is this cake suitable for people with gluten allergies?
Yes! You can easily adjust this Black Forest Cake recipe for a gluten-free option. Simply substitute all-purpose flour with a gluten-free flour blend. My recommendation is to use a 1:1 gluten-free flour that also includes xanthan gum, as it helps provide structure similar to wheat flour. Be sure to check that other ingredients, like baking powder and cocoa powder, are labeled gluten-free as well!
Irresistibly Moist Black Forest Cake with Cherry Bliss
Ingredients
Equipment
Method
- Preheat the oven to 350°F (175°C) and prepare two 8-inch round cake pans.
- In a mixing bowl, sift together all dry ingredients and whisk to combine.
- In another bowl, whisk the wet mixture until well blended.
- Combine the wet and dry ingredients to create the cake batter.
- Divide the batter into prepared pans and bake for 28 to 35 minutes.
- Cool the cakes in the pans for 15 to 20 minutes, then invert onto wire racks.
- Prepare the cherry filling by cooking cherries, sugar, and cornstarch until thick.
- Whip the cream with powdered sugar until stiff peaks form.
- Slice each cake layer in half horizontally and layer with cherry filling and whipped cream.
- Decorate with whipped cream, chocolate shavings, and cherries.
Leave a Reply