
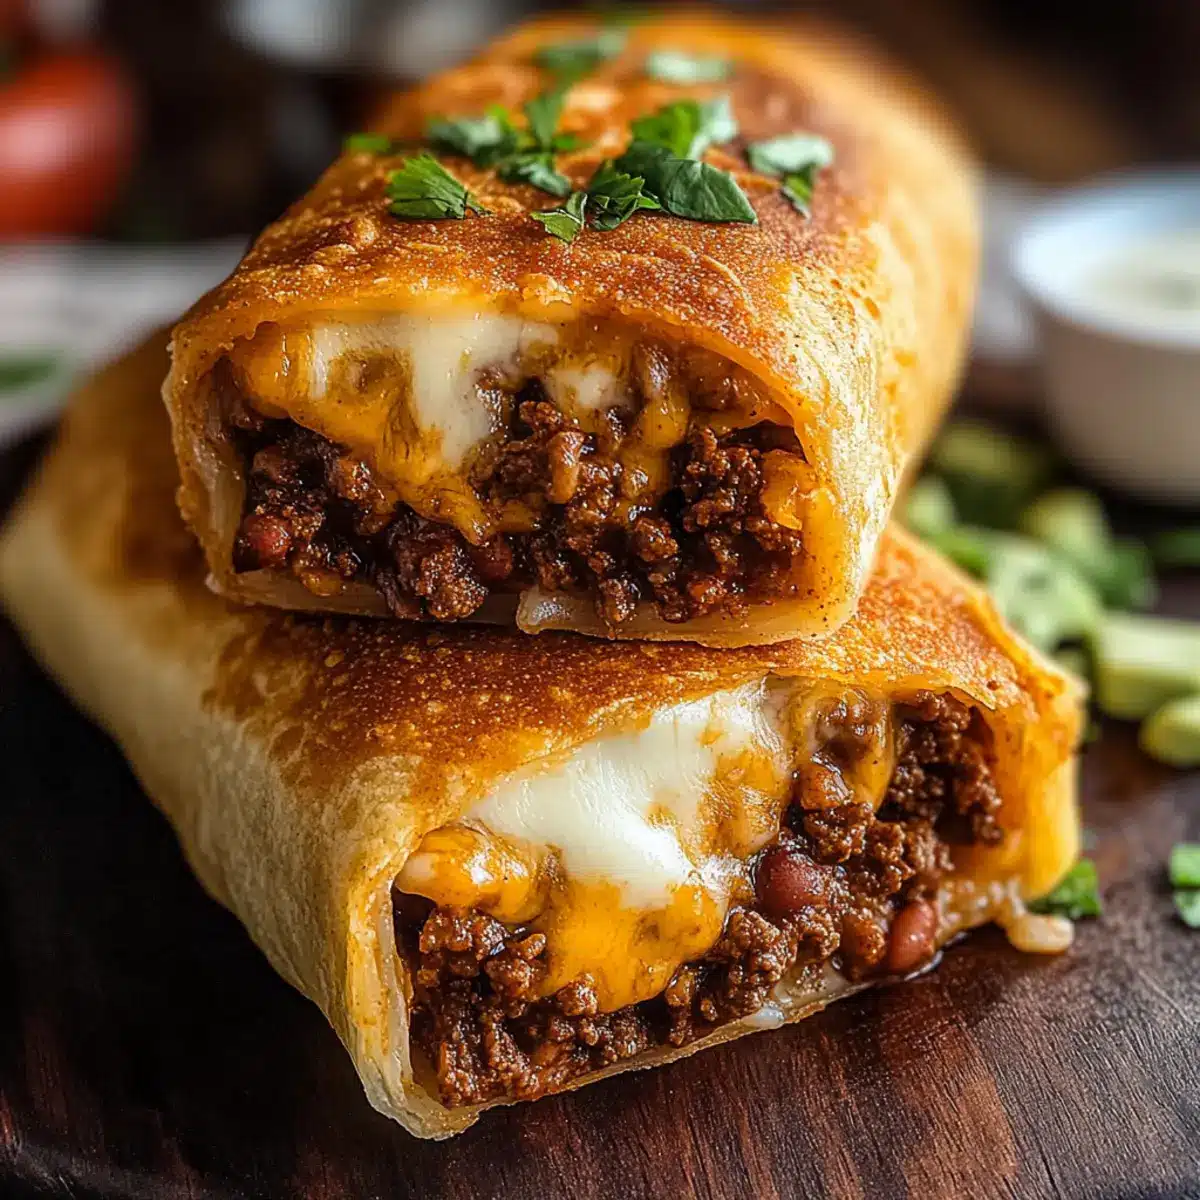
Stepping into the kitchen, the aroma of seasoned beef and melting cheese instantly transports me to a cozy Tex-Mex cantina. Today, I’m thrilled to share my crispy Beef and Cheese Chimichangas—a dish that beautifully marries rich flavors with crispy textures, promising to become a family favorite. Whether you choose to fry or bake them, these chimichangas are quick to prepare and fully customizable to suit your taste. Plus, they’re perfect for meal prep and can easily be frozen, allowing you to enjoy this delightful treat any night of the week. Are you ready to discover how simple it is to create a restaurant-quality dish right at home? Let’s dive into the recipe!
Why Are These Chimichangas a Must-Try?
Crispy Perfection: Enjoy a golden exterior that perfectly contrasts the gooey, cheesy filling.
Customizable Delight: Feel free to swap proteins or add your favorite veggies—this recipe adapts to your cravings!
Kid-Approved: With flavors that even fussy eaters love, you’ll have an easy family favorite on repeat.
Meal Prep Friendly: Make a batch ahead and freeze for a quick meal option; just pop them in the oven!
Healthier Options: Bake instead of fry, and choose whole wheat tortillas for a nutritious twist—delicious doesn’t have to mean indulgent!
Dive right into making your own Honey Garlic Butter Chicken with Mac Cheese or take a break with splendid Easy Cheese and Everything Bagel Stuffed Mini Peppers.
Beef and Cheese Chimichangas Ingredients
For the Filling
- Ground Beef – The main protein source that ensures a flavorful filling; for a twist, try shredded chicken, ground turkey, or pulled pork.
- Onion – Adds essential depth to the beef; finely diced pieces will cook evenly for a cohesive blend.
- Garlic – Minced for optimal flavor distribution, bringing aromatic goodness to the mix.
- Taco Seasoning – A pre-made or homemade blend enhances the beef’s flavor with traditional Tex-Mex spice.
- Salsa – Provides moisture and tang; if you prefer, swap in tomato sauce for a different base.
- Refried Beans – Delivers creaminess and richness; feel free to omit for a lighter, meatier option.
- Shredded Cheese – Melts beautifully; opt for cheddar, Monterey Jack, or a Mexican blend to keep it classic.
- Flour Tortillas – Burrito-sized tortillas hold the filling well; warming them slightly will prevent tearing when rolling.
- Vegetable Oil – Ideal for brushing or frying; choose a neutral oil to keep flavors balanced.
Enjoy these Beef and Cheese Chimichangas as they are or customize them to suit your tastes!
Step‑by‑Step Instructions for Beef and Cheese Chimichangas
Step 1: Prepare the Filling
In a large skillet over medium heat, brown 1 pound of ground beef along with 1 finely diced onion for about 5-7 minutes until the meat is no longer pink and the onion is translucent. Drain any excess grease, then stir in 2-3 cloves of minced garlic, 1 tablespoon of taco seasoning, and 1/2 cup of salsa. Allow the mixture to simmer for 2-3 minutes until heated through and flavorful.
Step 2: Assemble the Chimichangas
Warm 4 large flour tortillas slightly by microwaving them for about 20 seconds to make them pliable. Spread a couple of tablespoons of refried beans on each tortilla, then add a generous scoop of the beef filling along with 1 cup of shredded cheese. Carefully fold in the sides and roll the tortillas tightly like burritos, ensuring the filling is secure.
Step 3: Prepare for Cooking
If you choose to fry the chimichangas, heat about 1 inch of vegetable oil in a frying pan over medium-high heat until it reaches 350°F (175°C). For the baked version, preheat your oven to 400°F (200°C). For both methods, brush the seam of each chimichanga with a little oil to help them crisp.
Step 4: Cook the Chimichangas
For the fried chimichangas, place them seam-side down in the hot oil and fry for 2-3 minutes on each side until golden and crispy. Use tongs to flip them carefully. For the baked chimichangas, arrange them on a baking sheet, brush the tops with oil, and bake for 20-25 minutes until they are golden brown and crisp.
Step 5: Serve and Enjoy
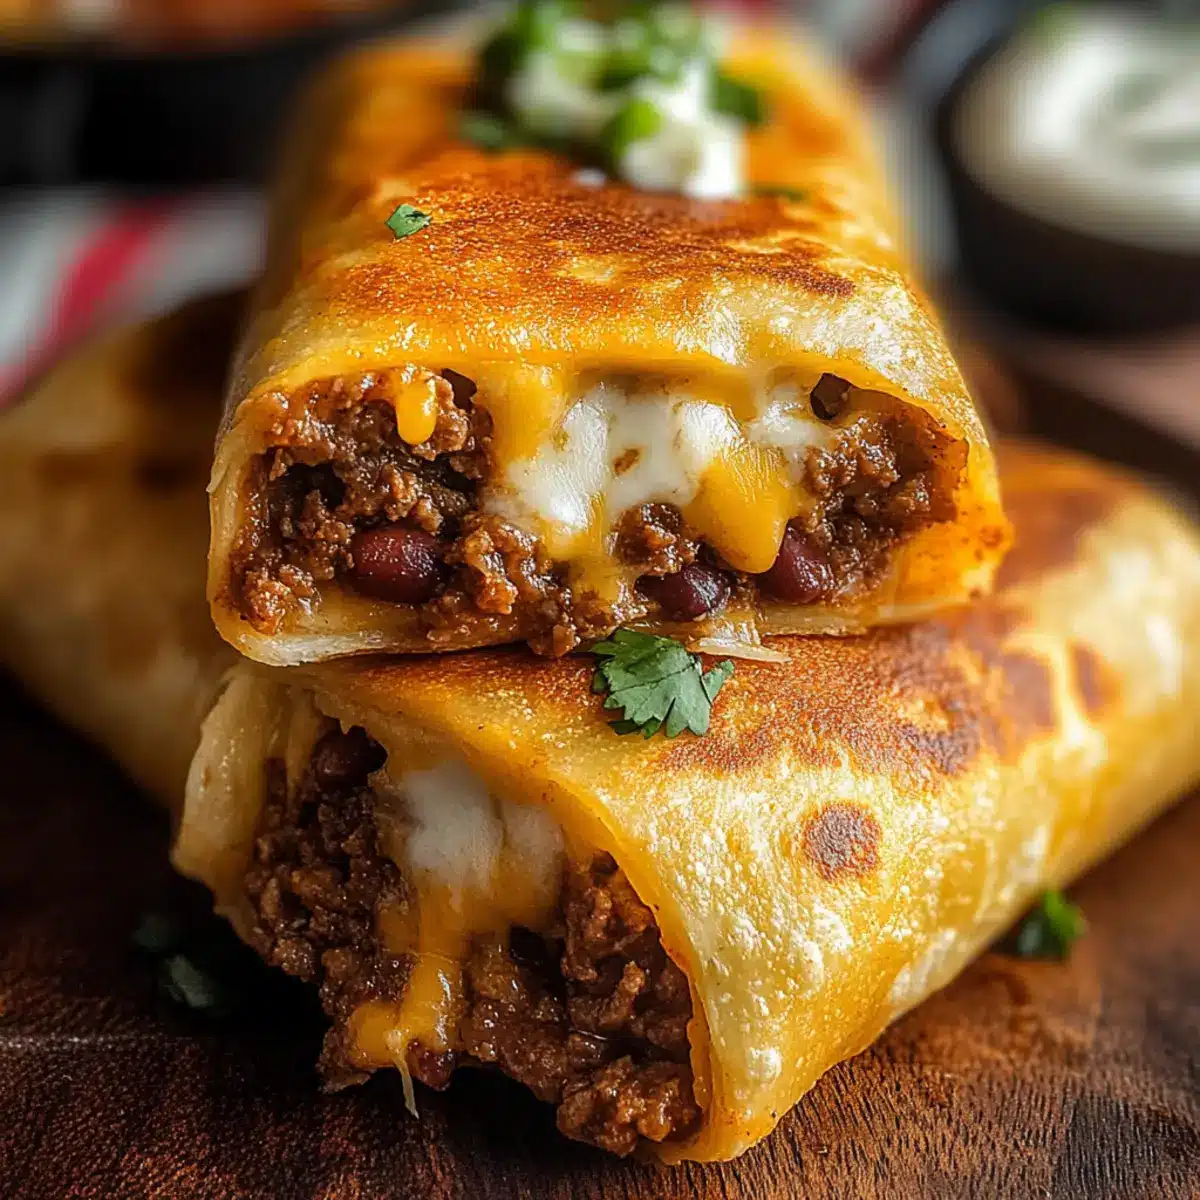
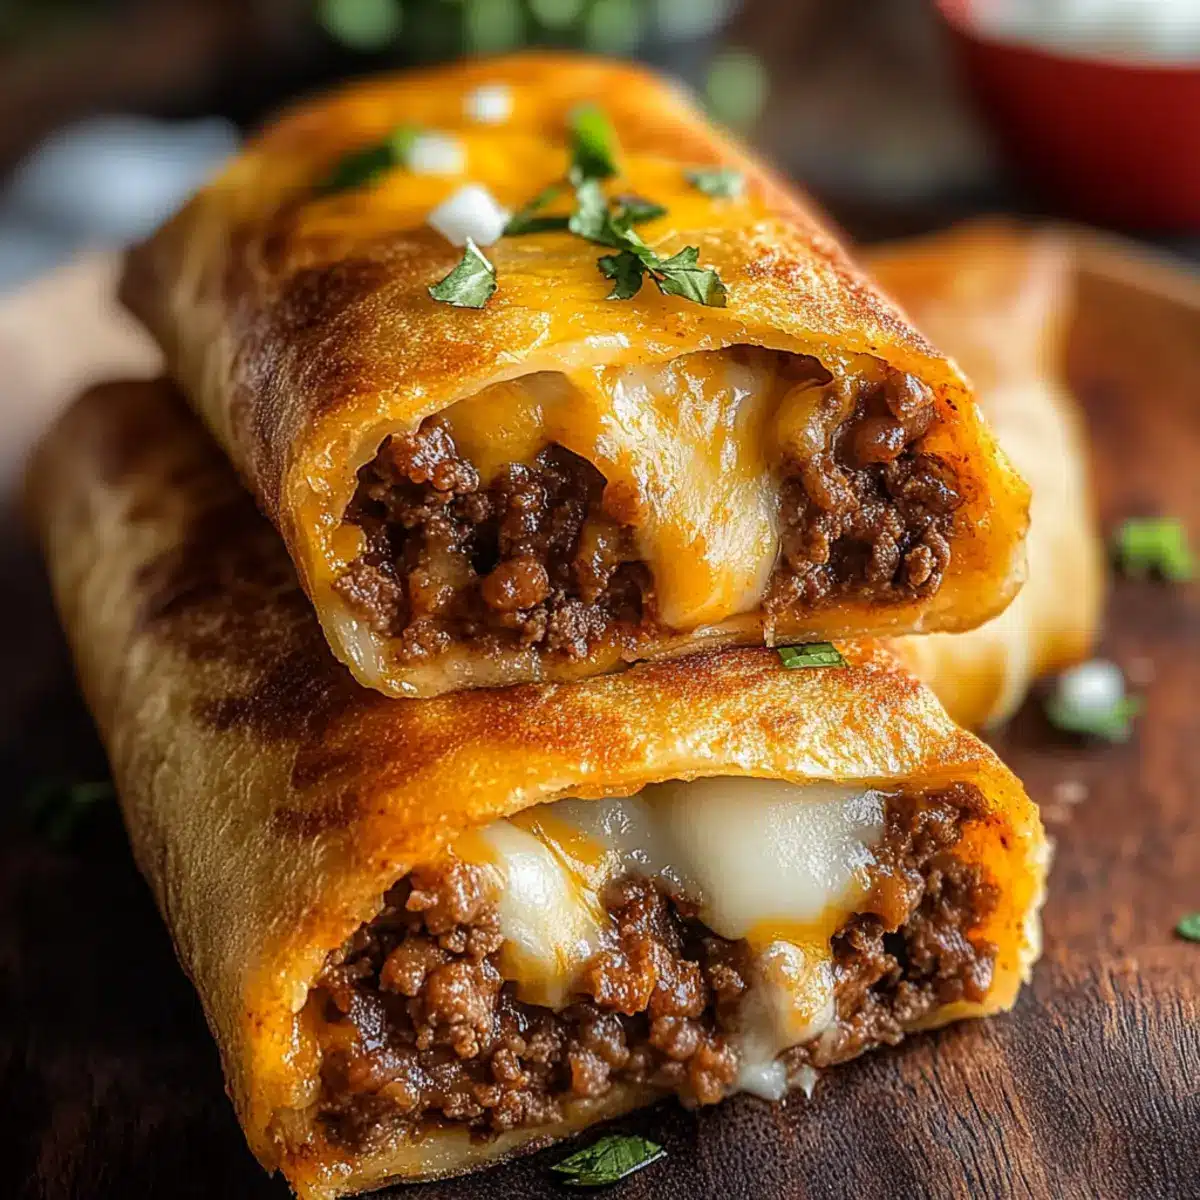
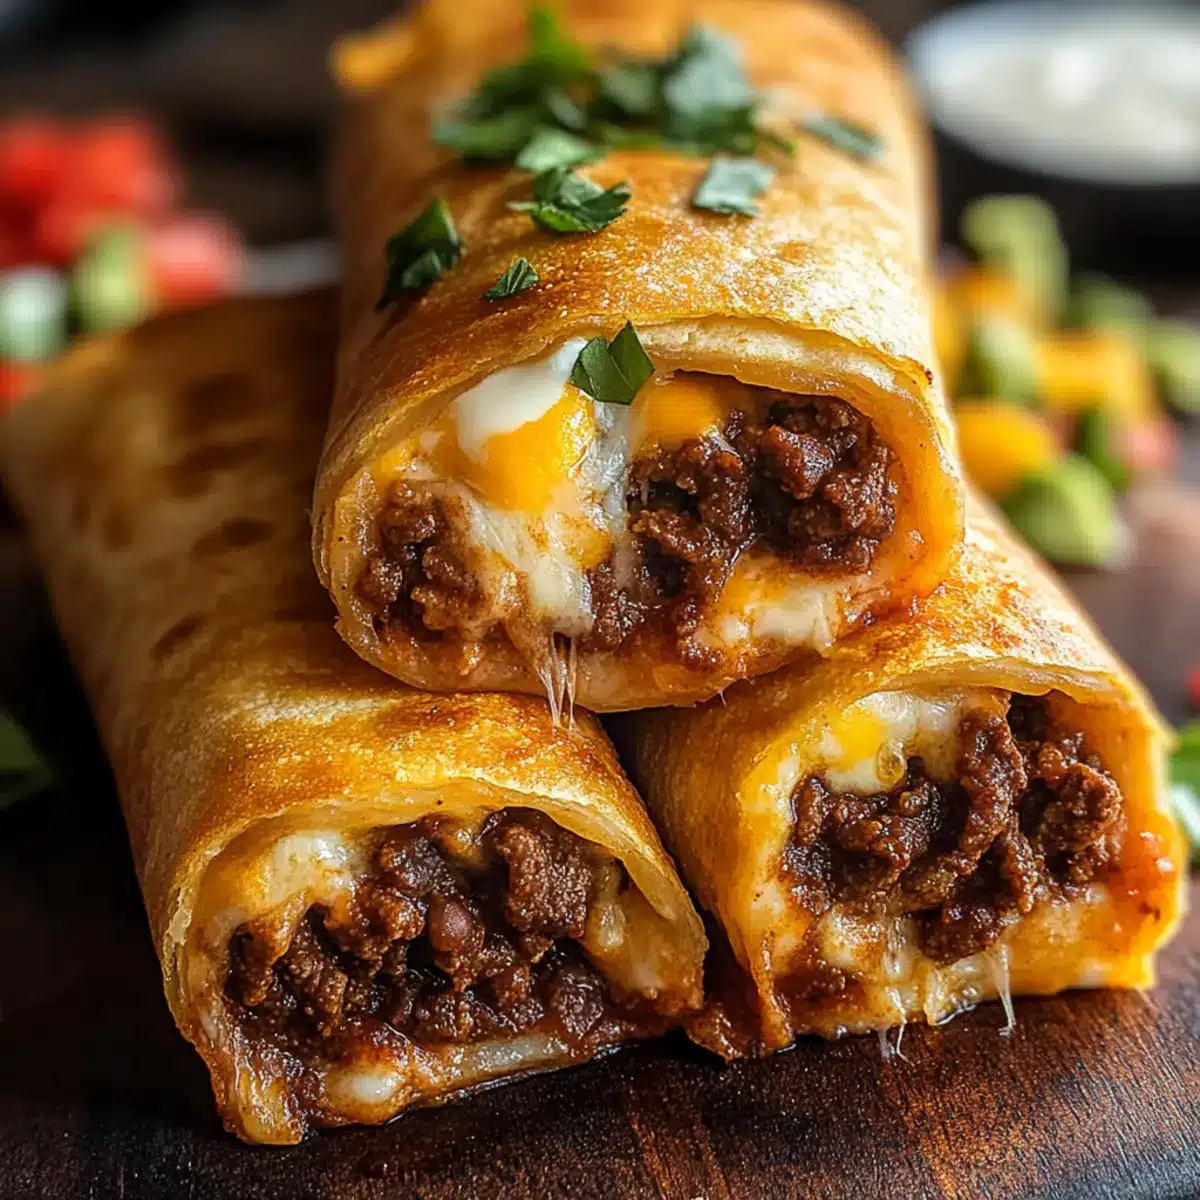
Once cooked, remove your Beef and Cheese Chimichangas from the oil or oven and let them cool slightly on a wire rack to maintain crispiness. Serve immediately with your favorite toppings such as guacamole, sour cream, or pico de gallo, and savor the warm, cheesy goodness of this Tex-Mex treat!
Expert Tips for Beef and Cheese Chimichangas
-
Prevent Leakage: Secure the seams of chimichangas with toothpicks or a light pinch before frying to ensure your filling stays put.
-
Crispy Leftovers: Avoid using the microwave to reheat; instead, use the oven or air fryer to maintain that delicious crispiness.
-
Warm Tortillas: Always warm your flour tortillas slightly before filling; this prevents tearing and helps them roll better for your Beef and Cheese Chimichangas.
-
Experiment with Fillings: Don’t hesitate to add veggies or swap proteins; colorful bell peppers and zucchini make delicious additions!
-
Perfect Frying Temperature: Make sure your oil is at the right temperature (350°F) before adding the chimichangas; this avoids greasy results and keeps them crispy.
-
Prepare Ahead: Assemble and freeze uncooked chimichangas for up to two months—perfect for quick weeknight meals.
Make Ahead Options
These Beef and Cheese Chimichangas are ideal for meal prep, making your busy weeknights a breeze! You can assemble uncooked chimichangas and freeze them for up to 2 months, ensuring you have a quick meal ready to go. Simply wrap each one tightly in plastic wrap, then store in a freezer-safe bag. To cook, there’s no need to thaw—just fry or bake straight from frozen, adding a few extra minutes to the cooking time. If you prefer to prep a day ahead, you can refrigerate assembled chimichangas for up to 24 hours. Just ensure they are covered with foil to prevent drying out. When you’re ready to serve, follow your cooking method of choice for delicious, crispy results that feel just as good as fresh!
What to Serve with Beef and Cheese Chimichangas?
Enjoy the vibrant flavors of your beef chimichangas with delightful sides and drinks that elevate every bite!
- Creamy Guacamole: The rich, buttery texture of guacamole perfectly complements the crispy chimichangas and enhances the Tex-Mex experience.
- Zesty Salsa Fresca: Fresh tomatoes, onions, and cilantro bring a dash of brightness, cutting through the richness of the chimichangas for a refreshing twist.
- Crisp Mexican Street Corn Salad: A delightful medley of corn, cotija cheese, and lime creates a crunchy side that adds a burst of flavor to the meal.
- Savory Refried Beans: A classic companion, refried beans add creaminess that echoes the filling, creating a deliciously cohesive flavor profile.
- Tangy Sour Cream: This cool and tangy dip softens the spice and provides a luscious element for topping your chimichangas, making each bite more delightful.
- Hearty Cilantro Lime Rice: The fragrant rice adds a bright, citrusy note that balances the dish perfectly while providing a delightful texture contrast.
- Spiced Mexican Hot Chocolate: This warm drink pairs beautifully with the chimichangas, providing cozy notes of cinnamon that complement the savory spices.
- Fruity Horchata: This sweet rice milk drink cools off the palate while adding a creamy sweetness that’s the perfect contrast to savory flavors.
- Freshly Cut Lime Wedges: A squeeze of lime over your chimichangas enhances their flavors dramatically, introducing a zesty kick that brings everything together.
How to Store and Freeze Beef and Cheese Chimichangas
Fridge: Store cooked chimichangas in an airtight container for up to 3 days. Reheat in the oven to maintain crispiness.
Freezer: Uncooked beef and cheese chimichangas can be assembled and frozen for up to 2 months. Cook directly from frozen, adding extra time as needed.
Reheating: For leftovers, avoid the microwave; reheat in the oven at 375°F (190°C) for about 10–15 minutes until heated through and crispy.
Wrapping: If freezing, wrap each chimichanga individually in plastic wrap followed by aluminum foil to prevent freezer burn.
Beef and Cheese Chimichangas Variations
Feel free to let your creativity shine while preparing these delightful chimichangas; the taste possibilities are endless!
-
Dairy-Free: Substitute the cheese with a dairy-free blend to keep the texture creamy while being lactose-free.
-
Spicy Version: Add fresh jalapeños or chipotle sauce for a kick! A little heat can elevate the dish, making it perfect for spice lovers.
-
Vegetarian Delight: Replace beef with black beans and sautéed bell peppers for a hearty filling that everyone will adore. Versatile and colorful!
-
Breakfast Twist: Use scrambled eggs and bacon instead of beef for a fun breakfast version. Serve with salsa for a delightful morning treat.
-
Smothered Chimichangas: Drizzle enchilada sauce or queso over the top before serving for a comforting, gooey finish. Everyone loves a cheesy layer!
-
Bean & Beef Combo: Mix refried beans into the beef filling for added creaminess and fiber. It’s an easy way to enhance texture and flavor.
For more creative meal ideas, check out my delicious Crock Pot Beef Stew or try some tasty Ground Beef Lettuce Wraps.
Beef and Cheese Chimichangas Recipe FAQs
How do I select the right ripeness for the ingredients?
Absolutely! For the best flavor and texture in your Beef and Cheese Chimichangas, select firm, fresh produce. Choose firm onions with smooth skins and avoid any with dark spots. If using garlic, look for dry, plump bulbs without sprouting. Fresh salsa or tomatoes should also be bright and evenly colored.
How should I store leftover chimichangas?
Very! Store cooked chimichangas in an airtight container in the refrigerator for up to 3 days. Ensure they’ve cooled completely before sealing to avoid condensation, which can make them soggy. Just pop them in the oven to reheat, maintaining that perfect crispy exterior!
Can I freeze my chimichangas? If so, how?
Yes, you can! To freeze uncooked Beef and Cheese Chimichangas, wrap each one tightly in plastic wrap and then in aluminum foil to prevent freezer burn. They can be stored for up to 2 months. When ready to cook, you can bake them straight from frozen, adding about 5-10 extra minutes to the baking time. No thawing necessary!
What should I do if my chimichangas are leaking during frying?
To prevent leakage during frying, be sure to secure the seams with toothpicks before placing them in the hot oil. If leakage occurs, it can be a sign that the tortillas were either not warmed adequately beforehand or overfilled—consider using about 2-3 tablespoons of filling per chimichanga for best results.
Are these chimichangas safe for my pets?
Great question! It’s best to avoid giving chimichangas to pets. They contain ingredients like onions and garlic, which can be harmful to dogs and cats. Always keep human food separate from pet diets and opt for healthy treats specifically designed for your furry friends!
Can I make these chimichangas healthier?
Absolutely! For a lighter version of Beef and Cheese Chimichangas, consider baking instead of frying and opting for whole wheat tortillas. You could also use lean ground beef or turkey. Additionally, adding more vegetables into the filling boosts both flavor and nutrition without sacrificing taste!
Beef and Cheese Chimichangas: Crispy Tex-Mex Comfort Bites
Ingredients
Equipment
Method
- In a large skillet over medium heat, brown the ground beef along with the finely diced onion for about 5-7 minutes. Drain any excess grease, then stir in the minced garlic, taco seasoning, and salsa. Simmer for 2-3 minutes until heated through.
- Warm the flour tortillas slightly in the microwave for about 20 seconds. Spread a couple of tablespoons of refried beans on each tortilla, then add a scoop of the beef filling and shredded cheese. Fold in the sides and roll tightly like burritos.
- If frying, heat vegetable oil in a frying pan to 350°F. For baking, preheat your oven to 400°F. Brush the seams of each chimichanga with a little oil to help them crisp.
- Fry chimichangas seam-side down for 2-3 minutes on each side until golden brown. For baking, arrange on a baking sheet, brush tops with oil, and bake for 20-25 minutes until golden and crisp.
- Remove chimichangas from the oil or oven and cool slightly on a wire rack. Serve immediately with toppings like guacamole or sour cream.
Leave a Reply