
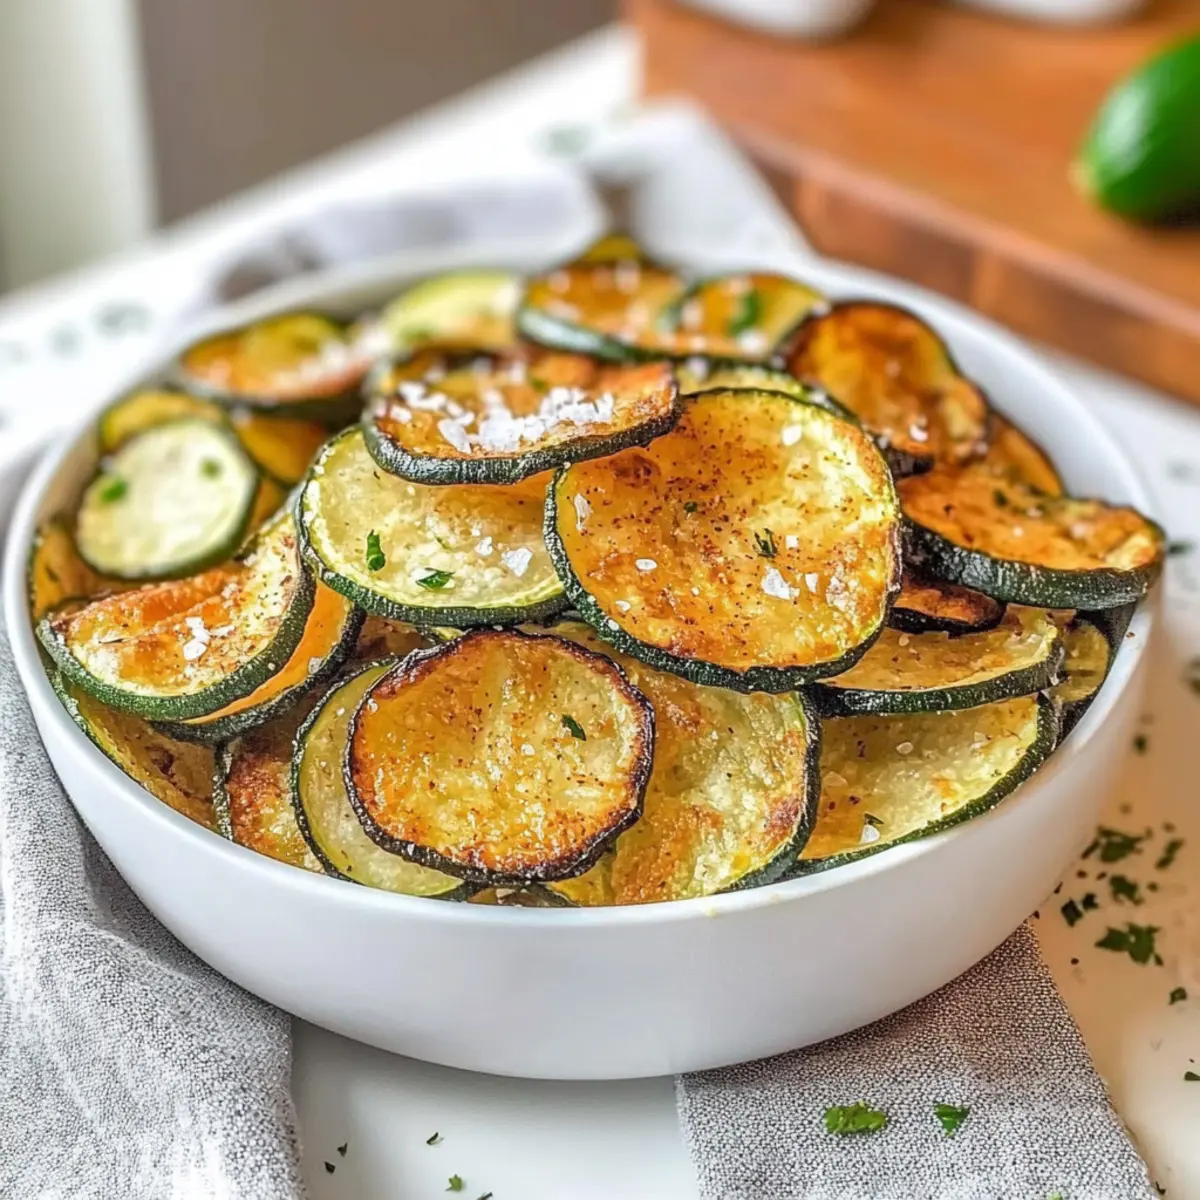
As I rummaged through my kitchen, a couple of fresh zucchinis caught my eye, whispering potential for a deliciously innovative snack. That’s when I decided to craft these Crispy Zucchini Chips—a healthy, guilt-free way to indulge cravings for something crunchy. Not only do these chips offer a satisfying bite, but they also bring a delightful burst of customization to your snacking with gluten-free, keto-friendly, and low-calorie perks. Perfect for those afternoons when you need something savory yet nutritious, these chips can easily be baked and seasoned to match any flavor preference. Grab a few extra ingredients like garlic powder or Parmesan, and the options are limitless! Ready to learn how to transform a humble zucchini into the best snack ever? Let’s dive in!
Why Should You Try Zucchini Chips?
Healthier Choice: These Crispy Zucchini Chips offer a guilt-free alternative to traditional chips, packed with vitamins and low in calories.
Customizable Flavors: Whether you prefer classic seasoning or a spicy kick, you can easily adjust the spices to match your cravings.
Quick & Easy: The baking process is simple—perfect for a speedy snack or dish that requires minimal prep time!
Versatile Pairing: Enjoy them alone or dip into your favorite sauces like hummus or guacamole for a tasty twist, just like with my Garlic Butter Shrimp for a complete meal.
Crowd-Pleaser: These chips appeal to everyone, making them a great addition to gatherings or simply a fun snack for movie nights.
Take your home snack game to the next level with these delicious, nutritious chips!
Crispy Zucchini Chips Ingredients
• Get ready to snack joyfully!
For the Chips
- Zucchini – The star of the show that provides a base for the chips; you can swap it for yellow squash for a change in flavor!
- Olive Oil – Essential for achieving that coveted crispiness; consider using avocado oil for a higher smoke point.
- Sea Salt – Highlights the natural goodness of zucchini; feel free to adjust the quantity based on your taste preference.
- Garlic Powder – Adds a savory depth to the flavor; try onion powder if you’re after something a bit milder.
- Smoked Paprika – This spice gives an irresistible smoky flavor; regular paprika serves as a gentler alternative.
- Black Pepper – Introduces a mild heat; you can easily skip it if you prefer a non-spicy version.
Optional Flavor Boost
- Grated Parmesan – Adds a cheesy kick that makes these Crispy Zucchini Chips even more enticing; omit it for a dairy-free twist or use nutritional yeast for a vegan option!
Step‑by‑Step Instructions for Crispy Zucchini Chips
Step 1: Preheat the Oven
Begin by preheating your oven to 250°F (120°C). This low temperature is crucial for dehydrating the zucchini slices slowly, ensuring they turn crispy without burning. While the oven warms up, gather your baking sheets and line them with parchment paper to prevent sticking and make cleanup easy.
Step 2: Prepare the Zucchini
Wash the zucchinis thoroughly under cold water, then pat them dry with a clean towel. Using a sharp knife or a mandoline, slice the zucchinis into 1/8-inch rounds. Aim for uniform thickness so that all your Crispy Zucchini Chips cook evenly, creating that perfect crunch throughout each chip.
Step 3: Draw Out Moisture
Arrange the zucchini slices on paper towels in a single layer, sprinkling them lightly with sea salt. Let them sit for about 10 minutes to draw out excess moisture, which helps in achieving crispy chips. After 10 minutes, pat the slices dry gently to remove any released moisture before seasoning.
Step 4: Season the Zucchini
In a mixing bowl, add the zucchini rounds and drizzle with olive oil. Sprinkle garlic powder, smoked paprika, and black pepper over them. Toss everything together until each slice is evenly coated with oil and seasonings, ensuring that your Crispy Zucchini Chips are full of flavor before they hit the oven.
Step 5: Arrange on Baking Sheet
Carefully transfer the seasoned zucchini slices to your prepared baking sheets, arranging them in a single layer without overlapping. This spacing is essential for air circulation, allowing the chips to crisp up perfectly as they bake. If you have excess slices, consider using another baking sheet to avoid overcrowding.
Step 6: Bake to Perfection
Place the baking sheets in the oven and bake for 1.5 to 2 hours. Halfway through, flip the zucchini chips gently to ensure even cooking. Keep an eye on them, checking around 90 minutes to see if they’ve reached a golden brown color and crispy texture. They should be firm to the touch when done.
Step 7: Cool and Serve
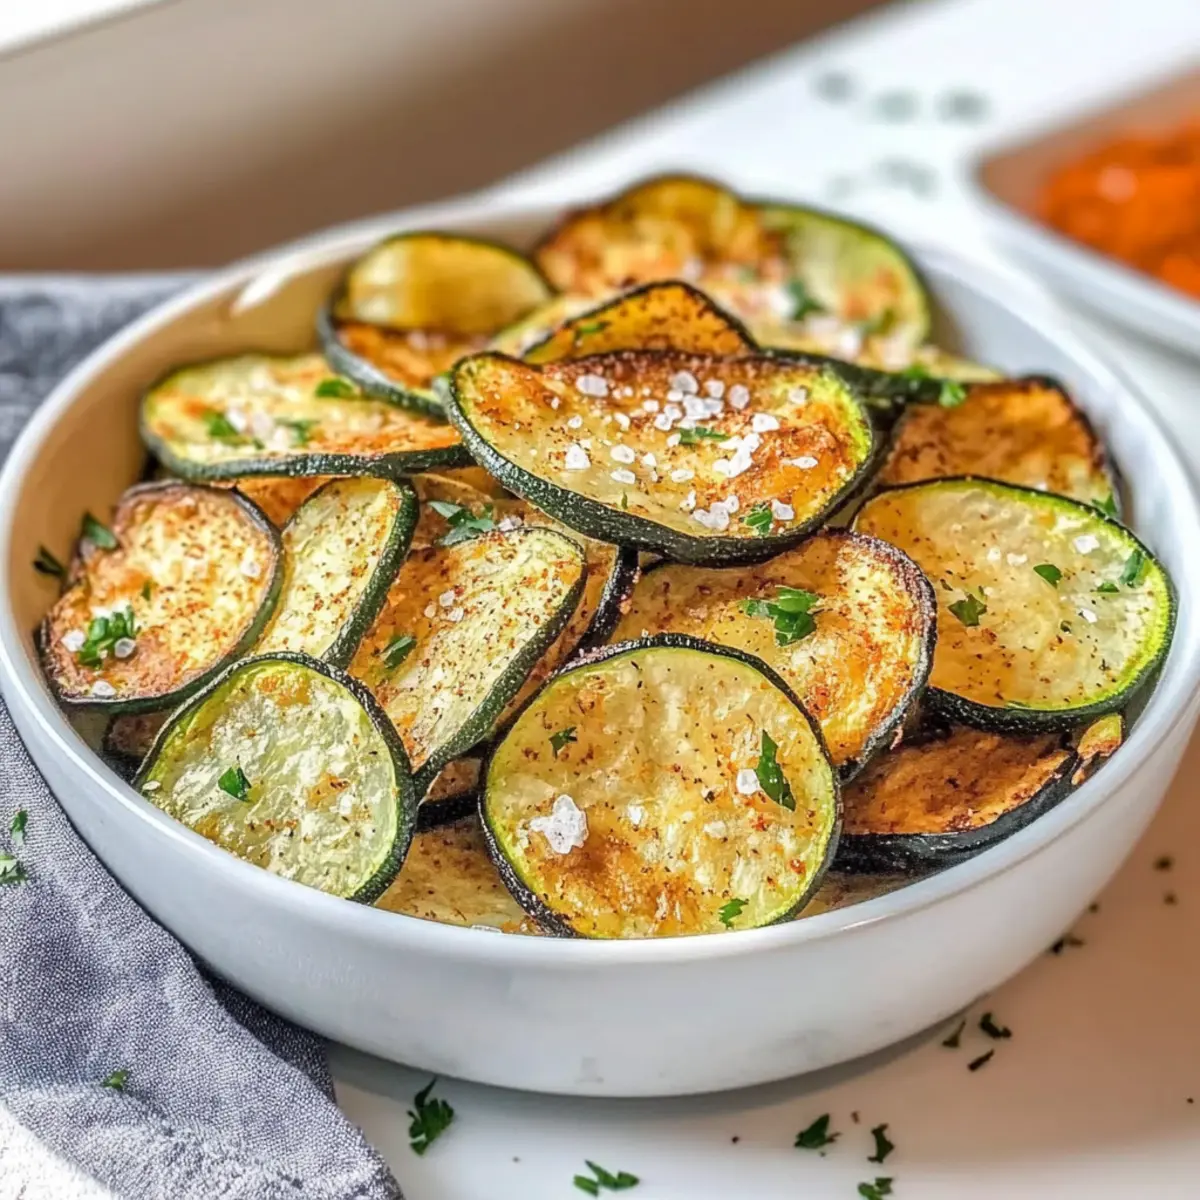
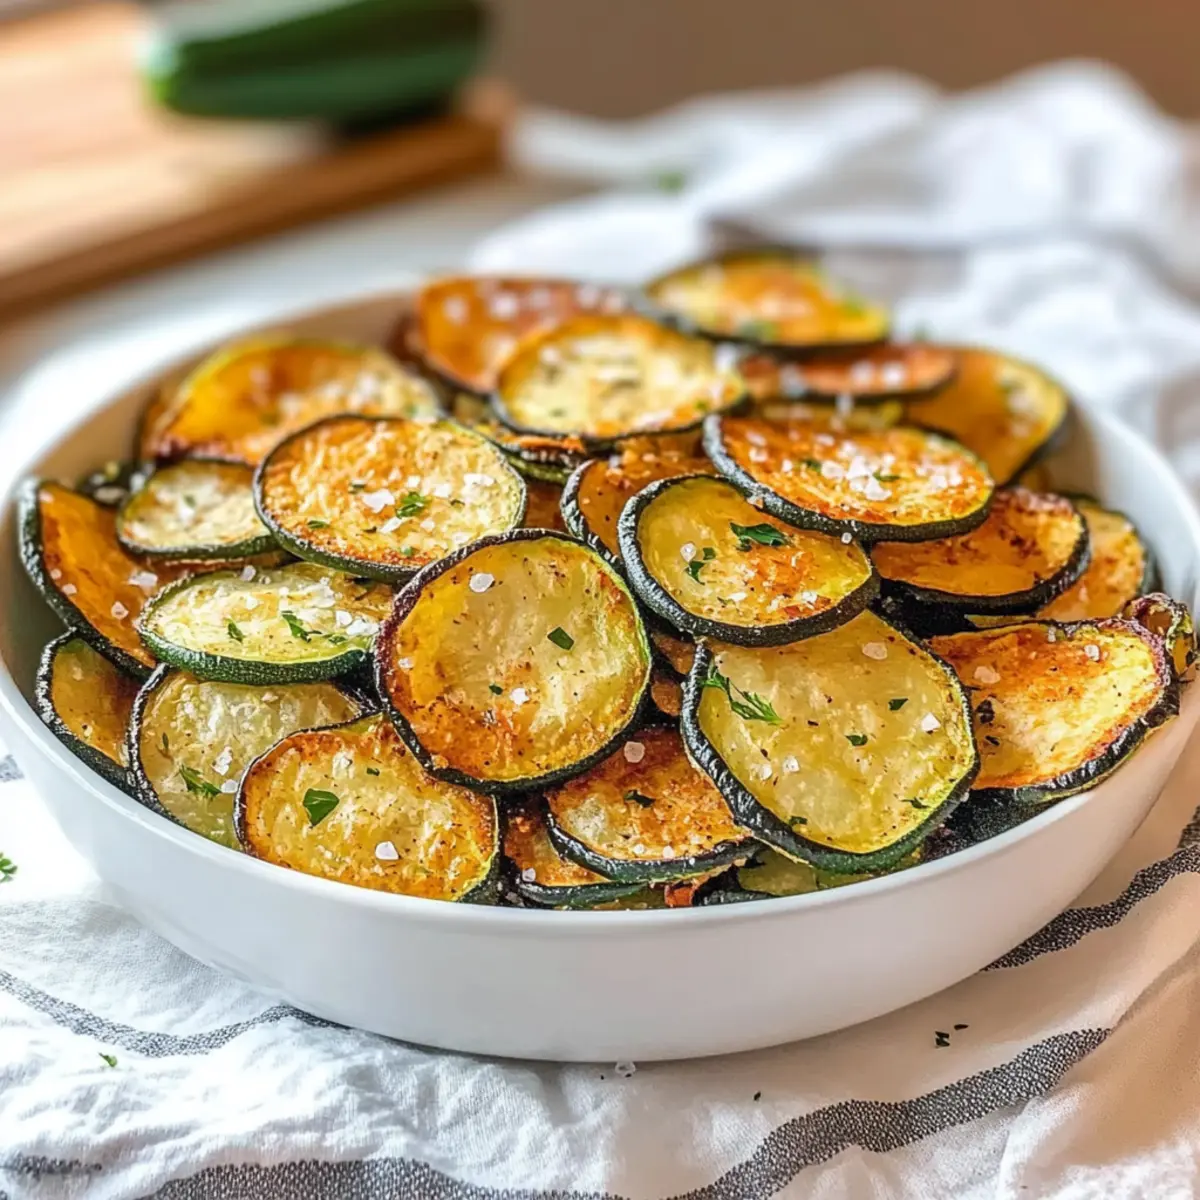
Once they’re baked to a gorgeous golden brown, remove the baking sheets from the oven and let the chips cool for about 5 minutes. This cooling period allows them to firm up further. Your Crispy Zucchini Chips are now ready to be enjoyed on their own or paired with your favorite dips!
What to Serve with Crispy Zucchini Chips
As the aroma of baked zucchini chips fills your kitchen, the possibilities for a complete meal start to bloom.
-
Creamy Hummus: This rich dip adds a creamy texture that beautifully contrasts the crunch of the chips while enhancing their flavor.
-
Avocado Salsa: A refreshing mix of diced avocado, tomatoes, and lime juice provides a vibrant burst of flavor that complements the savory zucchini chips perfectly.
-
Grilled Chicken Sandwich: Pairing these chips alongside a tender grilled chicken sandwich creates a satisfying and balanced meal, marrying crunchy and savory elements together beautifully.
-
Classic Cucumber Salad: The crisp, cool cucumber salad adds a refreshing bite that pairs wonderfully with the savory zucchini chips, making every bite a delight.
-
Tomato Basil Soup: Enjoy these chips as a delightful side with a warm tomato basil soup, where the crunchy texture enhances the creamy warmth of the soup.
-
Chilled White Wine: A glass of dry, chilled white wine balances the flavors and elevates your snacking experience, making it feel special every time.
Indulge in the delicious combinations that can take your crispy zucchini chips from a snack to an extraordinary meal!
Make Ahead Options
Preparing Crispy Zucchini Chips in advance is a fantastic way to save time during your busy week! You can slice the zucchini and season it up to 24 hours ahead of time. Simply follow your prep steps until the seasoning is added, then store the coated slices in a single layer on a baking sheet covered with parchment paper in the refrigerator. This helps prevent moisture buildup, ensuring your chips remain crispy when baked. When you’re ready to enjoy, just preheat the oven and bake as directed—your homemade snack will still be as delicious and crunchy as ever!
Crispy Zucchini Chips Variations
Feel free to shake things up and personalize your crispy zucchini chips for a snacking adventure!
-
Cheesy Twist: Sprinkle grated Parmesan on the chips before baking for an extra savory kick that elevates the flavor. It’s sure to please cheese lovers!
-
Herb-Infused: Toss the zucchini slices with Italian seasoning or fresh herbs like rosemary or thyme for an aromatic touch that complements the zucchini beautifully.
-
Spicy Kick: Add a pinch of chili powder or cayenne pepper for those who enjoy a spicy crunch. This will give your chips a delightful heat to spice up your movie night!
-
Sweet and Spicy: Experiment with a light dusting of cinnamon and a pinch of cayenne for a sweet and spicy profile that intrigues the taste buds. It’s a delightful surprise for those who love a flavor twist!
-
Ranch Flavored: Coat the slices with a ranch seasoning mix before baking. This classic combination will leave you craving more with every bite. Pair them with your favorite dip, and you’re in for a treat!
-
Lemon Zest: Brighten your chips by adding a bit of lemon zest to the olive oil before tossing it with the zucchini. This adds a refreshing zing that makes the flavors pop.
-
Dippable Delights: Weave in some crushed garlic for a robust garlicky taste or serve them with a side of creamy yogurt or hummus, reminiscent of the toppings you love with my Garlic Butter Shrimp!
-
Bacon Crumble: For a meaty addition, sprinkle cooked and crumbled bacon over the chips before baking for a smoky, savory delight that will impress guests and family alike.
With these variations, you’re all set to tailor these crispy zucchini chips to your unique taste preferences. Enjoy your culinary creativity!
Tips for the Best Crispy Zucchini Chips
-
Uniform Thickness: Make sure to slice the zucchini into even 1/8-inch rounds. Using a mandoline slicer can help achieve this for perfectly crispy Crispy Zucchini Chips every time.
-
Salt the Slices: Don’t skip the step of sprinkling salt on the zucchini slices. This helps draw out moisture and enhances flavor, which is crucial for achieving that satisfying crunch.
-
Avoid Overcrowding: Spread the zucchini slices out on the baking sheet. Crowding the pan can lead to steaming rather than crisping, resulting in soggy chips. Use multiple sheets if needed!
-
Watch the Oven: Baking times can vary depending on your oven. Keep an eye on your chips; check for that appealing golden brown color starting around 90 minutes to avoid overcooking.
-
Cool Before Serving: Let the zucchini chips cool for about 5 minutes after baking. This brief cooling period allows them to firm up and reach their ideal crispy texture.
How to Store and Freeze Crispy Zucchini Chips
Room Temperature: Store leftover Crispy Zucchini Chips in an airtight container at room temperature for up to 3 days to maintain their crunchiness.
Fridge: If you prefer to keep them longer, place the chips in the fridge, but note they may lose some crispness. Aim to consume them within 5 days.
Freezer: For longer storage, freeze the baked chips in a single layer on a baking sheet, then transfer to a resealable bag for up to 2 months.
Reheating: To regain their crispiness, re-bake the frozen chips in a preheated oven at 250°F (120°C) for 10-15 minutes, checking for the perfect crunch.

Crispy Zucchini Chips Recipe FAQs
How do I choose ripe zucchini for my chips?
Absolutely! When selecting zucchini, look for firm, smooth skin with a vibrant green color. Avoid zucchinis with dark spots or soft patches. Smaller zucchinis (around 6-8 inches long) tend to be more flavorful and have tender seeds, making them perfect for your Crispy Zucchini Chips.
What’s the best way to store leftover zucchini chips?
To keep your Crispy Zucchini Chips fresh, store them in an airtight container at room temperature for up to 3 days. If you want to maintain their crunchiness, avoid the fridge; cold storage may cause moisture to soften them.
Can I freeze Crispy Zucchini Chips? If so, how?
Absolutely! To freeze your chips, first allow them to cool completely. Lay them in a single layer on a baking sheet and pop them in the freezer for about 2 hours. Once frozen, transfer them to a resealable bag, squeezing out as much air as possible. They can last in the freezer for up to 2 months. When you’re ready to enjoy them again, re-bake at 250°F (120°C) for 10-15 minutes to regain that crunch!
What should I do if my zucchini chips are soggy?
If your Crispy Zucchini Chips come out soggy, several factors could be at play. Ensure you slice them evenly to promote uniform cooking, sprinkle them with enough salt to draw out moisture, and avoid overcrowding on the baking sheet. If they still end up soft, just pop them back in the oven for another 10-15 minutes to help crisp them up!
Are there any dietary considerations for these zucchini chips?
Very! These Crispy Zucchini Chips are gluten-free and fit well into keto and low-calorie diets, making them a versatile snack. For those with dairy allergies, simply omit the Parmesan or substitute with nutritional yeast for a vegan option. Always double-check ingredients if serving to those with food sensitivities or allergies!
Crispy Zucchini Chips: Your New Favorite Guilt-Free Snack
Ingredients
Equipment
Method
- Preheat your oven to 250°F (120°C) and line baking sheets with parchment paper.
- Wash the zucchinis and slice them into 1/8-inch rounds.
- Arrange zucchini slices on paper towels, sprinkle with sea salt, and let sit for 10 minutes.
- Pat the zucchini slices dry and mix with olive oil, garlic powder, smoked paprika, and black pepper.
- Arrange slices in a single layer on the baking sheets without overlapping.
- Bake for 1.5 to 2 hours, flipping halfway through until golden brown and crispy.
- Let the chips cool for about 5 minutes before serving.
Leave a Reply