
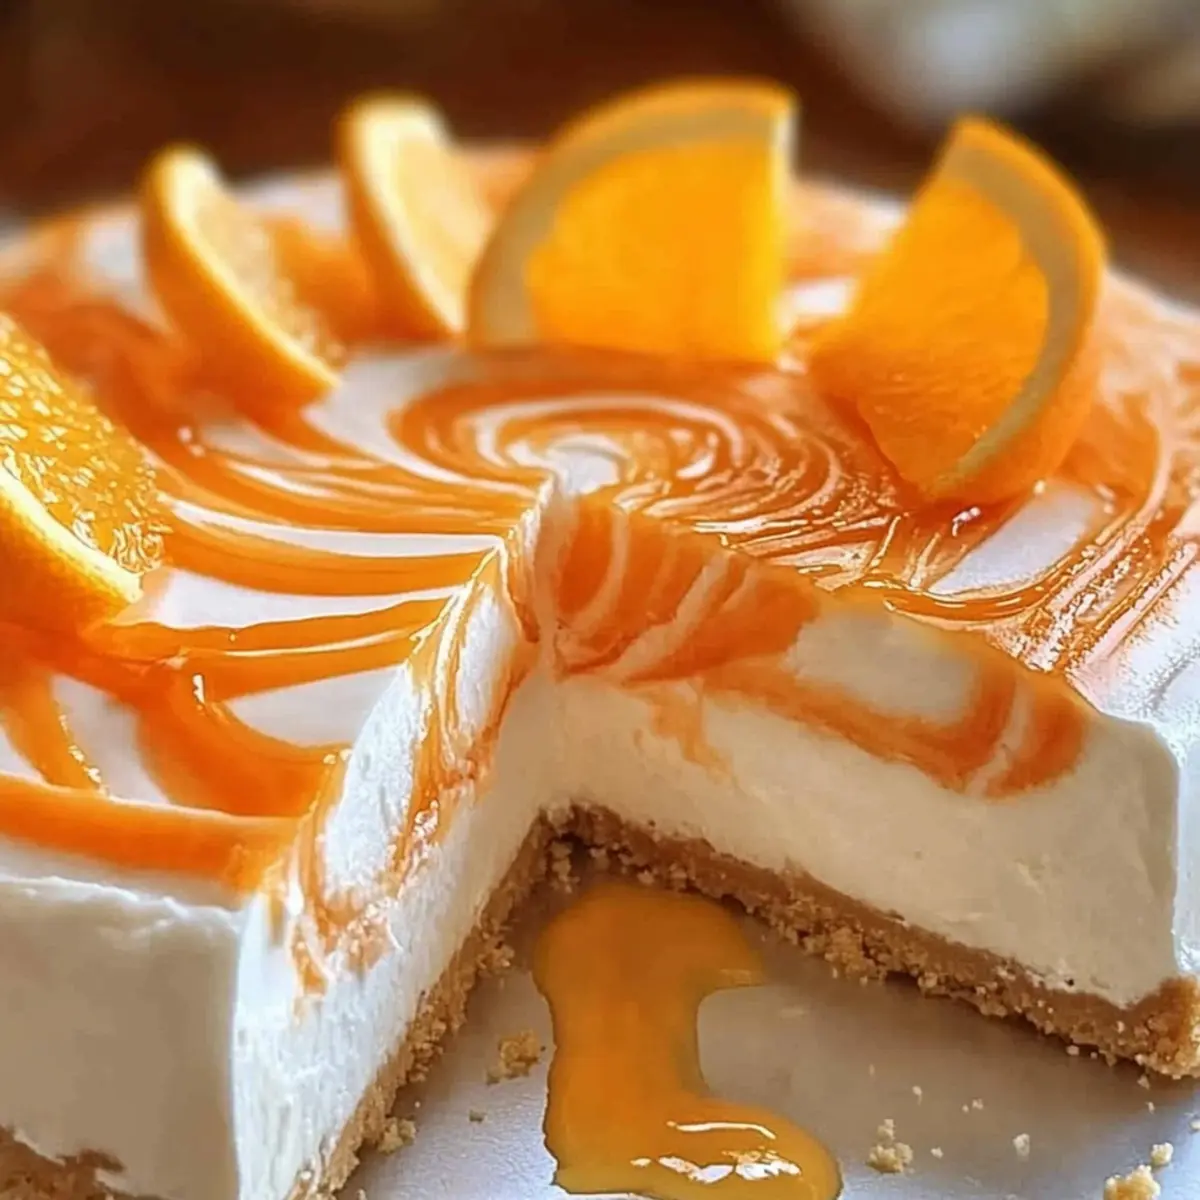
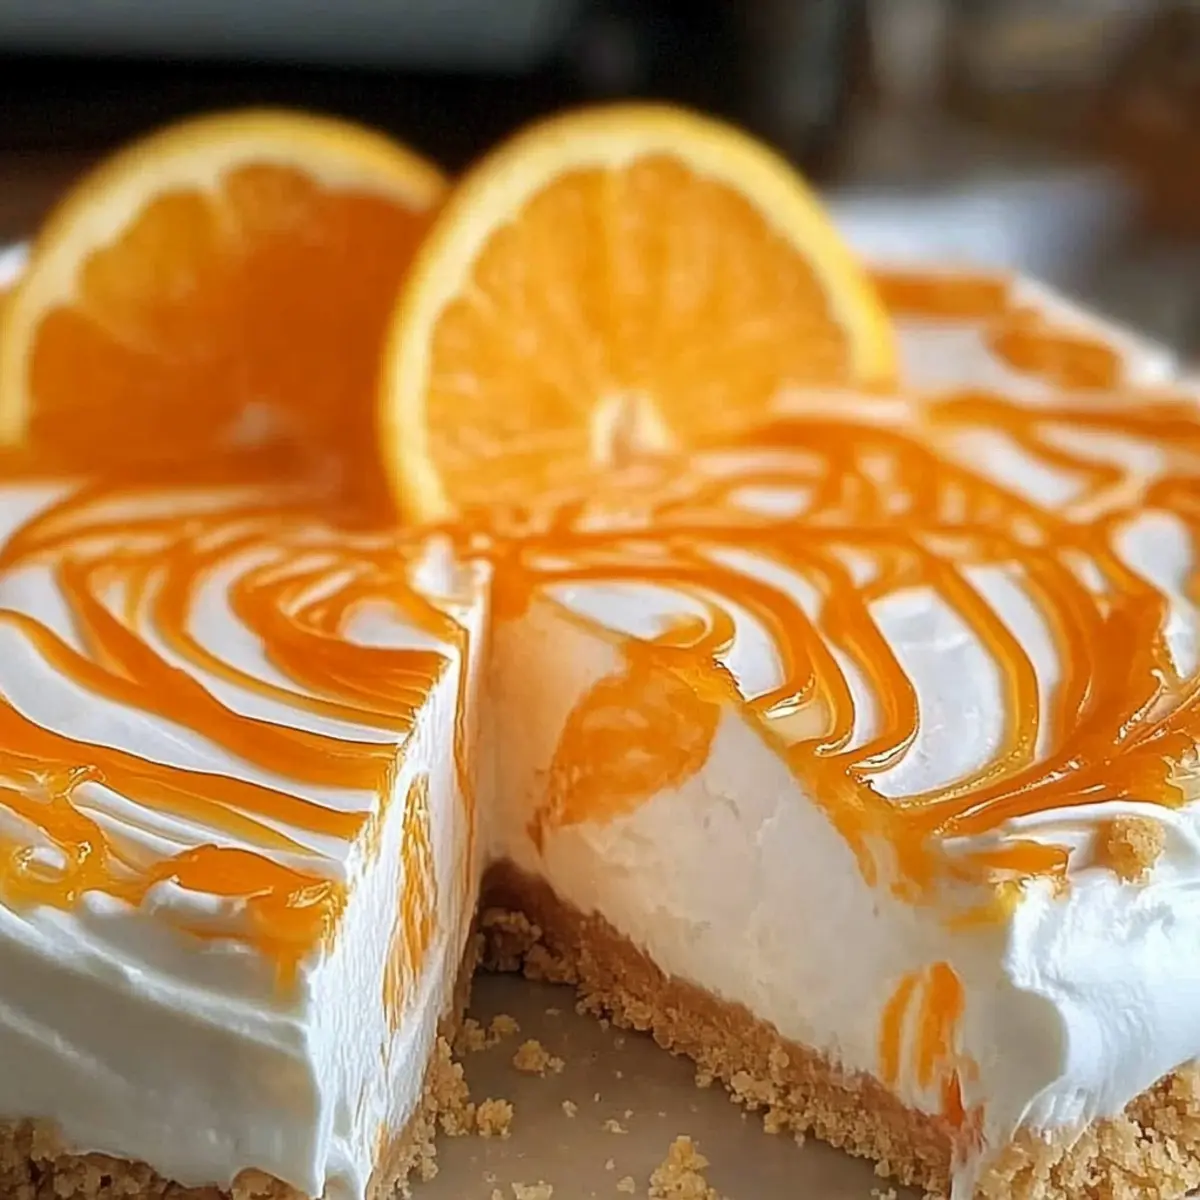
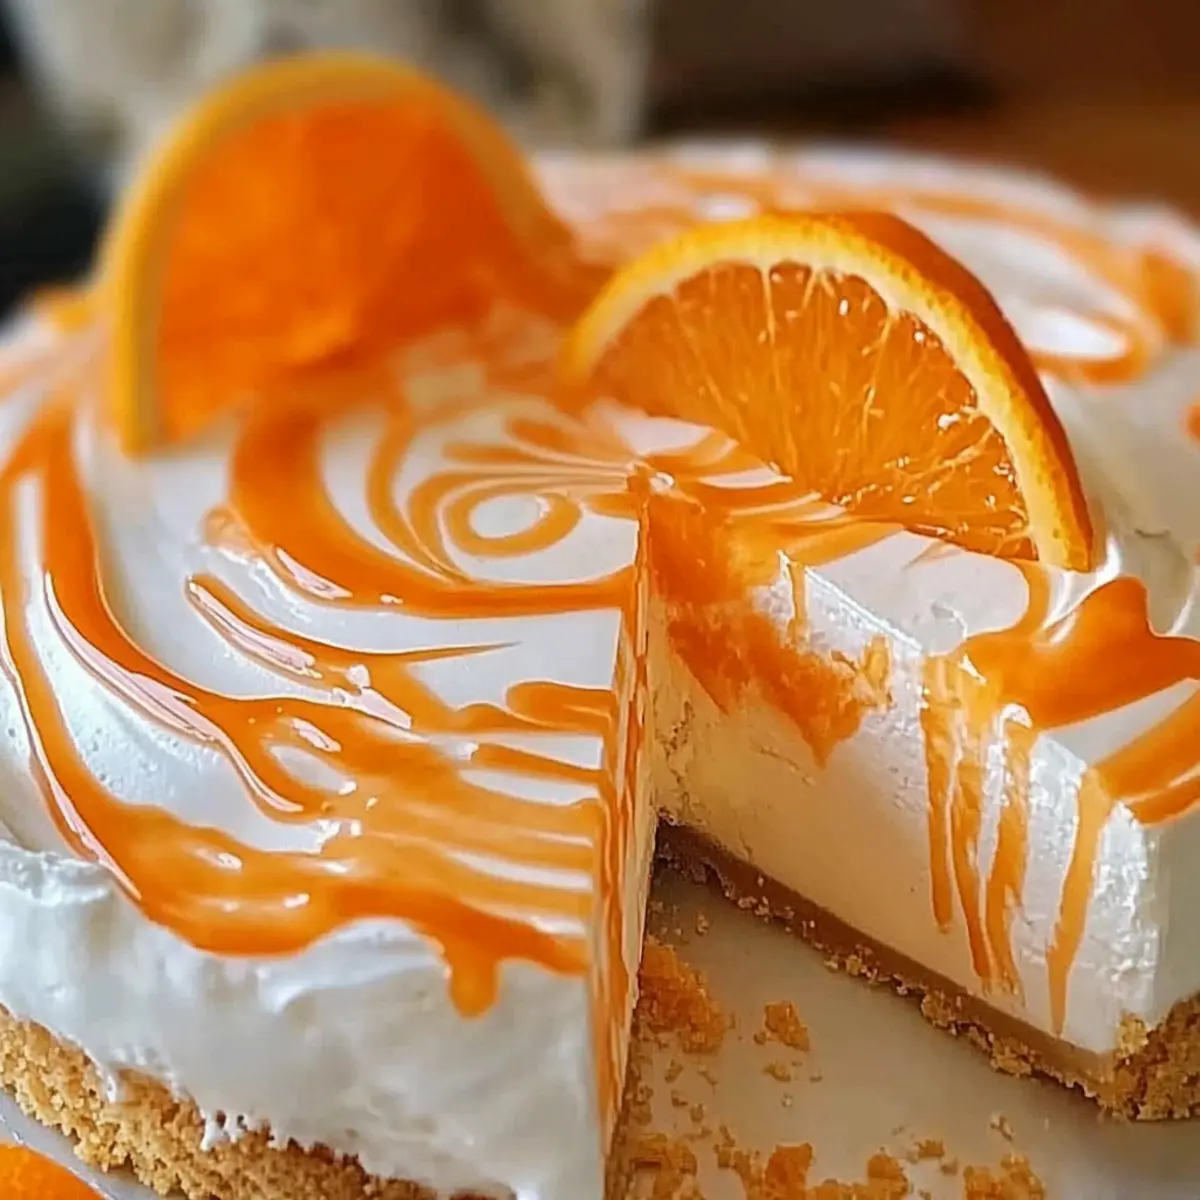
As I walked through a sunny farmer’s market, the sweet aroma of fresh citrus wafted through the air, instantly transporting me to warm summer days. Inspired by those vibrant oranges, I couldn’t resist creating a delightful No-Bake Orange Creamsicle Cheesecake that encapsulates that refreshing taste. This quick and easy dessert is perfect for gatherings, requiring no oven time yet delivering a stunningly creamy texture and a zesty kick. With just a few simple ingredients, you can whip up a treat that will impress both family and friends. Ready to dive into this creamy dream and brighten your next occasion?
Why is This Cheesecake a Must-Try?
Uniqueness: This No-Bake Orange Creamsicle Cheesecake captures the beloved flavors of a classic creamsicle in dessert form. Effortless Preparation: With no baking required, you can impress guests with minimal effort and time. Creamy Texture: The combination of cream cheese and whipped cream creates an incredibly smooth consistency that’s just heavenly. Versatile Flavors: Feel free to swap in lemon or lime juice for a delightful twist! Crowd-Pleaser: This dessert is an absolute hit at parties and gatherings, making it perfect for any occasion. Try it alongside our Strawberry Cheesecake Protein for even more dessert inspiration!
Orange Creamsicle Cheesecake Ingredients
-
For the Crust
• Graham Cracker Crumbs – Provides a sweet, crunchy base; substitute with cookie crumbs or ground nuts for a different flavor.
• Unsalted Butter – Binds the crust together; can be replaced with coconut oil for a dairy-free option. -
For the Filling
• Cream Cheese – Adds creaminess and richness; use mascarpone for a lighter texture.
• Powdered Sugar – Sweetens the filling and provides smoothness; granulated sugar can be used, but texture may be grainier.
• Heavy Whipping Cream – Creates a light, airy filling; use coconut cream for a non-dairy whipped option.
• Fresh Orange Juice – Delivers bright, citrus flavor; lemon juice can be used for a tangy variation.
• Zest of 1 Orange – Enhances orange flavor with aroma; substitute with lemon or lime zest for a different citrus angle.
• Vanilla Extract – Adds depth and warmth to the flavor profile; use vanilla bean paste for a richer taste.
• Unflavored Gelatin – Provides structure without baking; vegan alternatives include agar-agar.
• Cold Water – Used to dissolve gelatin, no substitutions required. -
For Garnish
• Additional Orange Slices/Zest – Optional decorative touch to enhance presentation and flavor.
This Orange Creamsicle Cheesecake is a refreshing treat everyone will love!
Step‑by‑Step Instructions for No-Bake Orange Creamsicle Cheesecake
Step 1: Prepare the Crust
In a medium bowl, combine graham cracker crumbs with melted unsalted butter until well mixed. Press this mixture firmly into the bottom of a 9-inch springform pan using the back of a measuring cup or your hands, creating an even layer. Place the crust in the refrigerator while you prepare the filling to help it set.
Step 2: Soften Cream Cheese
Take the cream cheese out of the refrigerator and allow it to soften at room temperature for about 30 minutes. Once it’s soft, transfer it to a large mixing bowl and beat with an electric mixer on medium speed until the consistency is smooth and creamy. This is crucial for a silky filling in your Orange Creamsicle Cheesecake.
Step 3: Add Sugar
Gradually sift powdered sugar into the softened cream cheese while mixing on low speed. Continue to beat the mixture until the sugar is fully incorporated and the filling is smooth, which should take about 1-2 minutes. Aim for a creamy texture with no lumps, ensuring your cheesecake filling is perfectly sweet.
Step 4: Incorporate Cream
Add heavy whipping cream, fresh orange juice, orange zest, and vanilla extract to the cream cheese mixture. Using an electric mixer, whip on high speed until the mixture becomes fluffy and holds soft peaks, about 2-3 minutes. This step helps achieve that light, airy texture in your No-Bake Orange Creamsicle Cheesecake.
Step 5: Prepare Gelatin
In a small bowl, sprinkle unflavored gelatin over cold water and let it sit for about 5 minutes until it blooms and softens. After blooming, gently heat the gelatin mixture in the microwave for 10-15 seconds, or until just melted, ensuring it doesn’t boil. This step is essential for providing structure to your cheesecake.
Step 6: Mix Gelatin
Remove the melted gelatin from the microwave and let it cool slightly. Gradually stir the warm gelatin into the cheesecake filling mixture, ensuring it’s fully incorporated without any lumps. This ensures that your No-Bake Orange Creamsicle Cheesecake will hold its shape once set, creating a delightful consistency.
Step 7: Fill Crust
Take your prepared crust out of the refrigerator and pour the creamy filling over it. Use a spatula to spread the filling evenly across the top of the crust. Gently tap the pan on the counter to release any air bubbles. This will also help the filling settle perfectly for your cheesecake.
Step 8: Chill
Cover the springform pan with plastic wrap or aluminum foil and place it in the refrigerator for at least 4 hours, or preferably overnight. This chilling time is crucial for the cheesecake to set properly, allowing the flavors to meld beautifully while it firms up for serving.
Step 9: Remove from Pan
Once fully chilled and set, carefully run a knife around the edges of the springform pan to loosen the cheesecake. Gently release the springform clasp and remove the sides of the pan to expose your beautifully set No-Bake Orange Creamsicle Cheesecake.
Step 10: Garnish and Serve
Before serving, feel free to decorate your cheesecake with additional orange slices or a sprinkle of orange zest on top for an extra pop of color. Slice into wedges and enjoy this refreshing and creamy dessert with family and friends!
Make Ahead Options
These No-Bake Orange Creamsicle Cheesecake options are perfect for busy home cooks looking to save time! You can prepare the crust and filling up to 24 hours in advance, allowing them to chill together for optimal flavor melding. Simply follow the first six steps of the recipe, stopping before the chilling process. Then, cover the filled cheesecake with plastic wrap and refrigerate. When you’re ready to serve, simply let it set in the fridge for a few hours, and garnish with fresh orange slices or zest before slicing. By prepping ahead, you’ll enjoy a delicious dessert that’s just as creamy and refreshing on serving day!
Orange Creamsicle Cheesecake Variations
Feel free to get creative with this delightful cheesecake, enhancing its flavors and making it uniquely yours!
- Citrus Twist: Replace orange juice with lemon or lime juice for a zesty alternative. This adds a refreshing tang that pairs beautifully with the creamy filling.
- Fruit Puree Layer: Spread a layer of fruit puree on top before serving for an added flavor boost. Consider raspberry or mango for a vibrant contrast.
- Whipped Cream Incorporation: Fold whipped cream into the filling for an even lighter texture. This twist creates a cloud-like creaminess, elevating each bite!
- Chocolate Drizzle: Drizzle melted dark chocolate over the top just before serving for a rich, indulgent touch. The chocolate complements orange beautifully, creating a heavenly pairing.
- Nutty Crust: Swap out graham cracker crumbs for almond or pecan crumbs in the crust for a nutty flavor. This adds an interesting crunch and a deeper taste profile.
- Spice it Up: Add a pinch of ground cinnamon or nutmeg to the filling for a warm, comforting flavor. This simple addition can transform your cheesecake into a cozy dessert experience.
- Heat Things Up: Mix in a pinch of cayenne pepper for a surprising kick! This twist adds depth and complexity that will surely intrigue your guests.
- Layered Cheesecake: Create a layered version by alternating layers of orange cheesecake and a chocolate or berry cheesecake filling. The visual appeal alone will impress everyone!
For more delicious ideas, try serving this with a slice of our refreshing No-Bake Cheesecake Wow or a scoop of luscious sorbet alongside!
Storage Tips for Orange Creamsicle Cheesecake
- Fridge: Store leftovers in the refrigerator for up to 3 days. Ensure the cheesecake is covered with plastic wrap or in an airtight container to maintain its creamy texture.
- Freezer: If you want to keep it longer, freeze the cheesecake for up to 2 months. Wrap it tightly in plastic wrap and aluminum foil to protect it from freezer burn.
- Thawing: To enjoy a frozen slice, transfer it to the fridge and let it thaw overnight. This helps retain the delicious flavors of the Orange Creamsicle Cheesecake.
- Reheating: This dessert is best served chilled. If needed, bring it to room temperature for about 20 minutes before serving for enhanced flavor.
Expert Tips for Orange Creamsicle Cheesecake
- Soften Cream Cheese First: Make sure to let the cream cheese come to room temperature for a smooth filling; this prevents lumps in your Orange Creamsicle Cheesecake.
- Bloom Gelatin Properly: Ensure the gelatin is fully bloomed and just melted, as overheating can diminish its setting power.
- Chill For Best Results: Refrigerate the cheesecake overnight if possible; longer chilling enhances the flavors and texture of your dessert.
- Use Fresh Ingredients: Always use fresh orange juice and zest for the brightest flavor; bottled juice may lack the same vibrancy.
- Avoid Overmixing: When incorporating the whipped cream, mix just until fluffy; overmixing can cause the filling to become dense rather than airy.
What to Serve with No-Bake Orange Creamsicle Cheesecake
This delightful dessert truly shines when paired with complementary flavors and textures, creating a well-rounded dining experience.
-
Fresh Fruit Salad: A medley of seasonal fruits adds bright colors and a refreshing contrast to the cheesecake’s creamy texture. Light and juicy, it’s the perfect balance!
-
Minty Green Tea: The herbal notes of a freshly brewed mint tea cleanse the palate, enhancing the citrus flavor of the cheesecake. Its warm aroma invites delightful conversation.
-
Buttery Shortbread Cookies: These crumbly cookies provide a rich, buttery crunch, offering a delightful contrast to the creamy cheesecake. Simple yet sophisticated, they’ll impress your guests.
-
Chocolate-covered Strawberries: Juicy strawberries dipped in rich chocolate add a touch of decadence. The sweet and slightly tart fruit pairs beautifully with the orange creaminess.
-
Coconut Whipped Cream: A dollop of coconut whipped cream adds a tropical flair that complements the orange flavors perfectly. Light and creamy, it elevates the overall experience.
-
Iced Lemonade: The tangy refreshment of iced lemonade provides a zesty contrast to the cheesecake’s sweetness, making for a vibrant pairing that quenches thirst on warm days.
-
Sparkling Water with Citrus: Crisp, fizzy sparkling water with lemon or lime slices enhances your dessert with a burst of effervescence, cleansing the palate and bringing out the cheesecake’s flavors.
-
Ginger Snap Cookies: The spice from ginger snaps adds warmth and depth, creating an intriguing flavor contrast. Their crunchy texture perfectly complements the smooth cheesecake.
-
Vanilla Bean Ice Cream: For an extra indulgence, top slices with a scoop of vanilla bean ice cream. The creaminess pairs well, while the vanilla notes enhance the orange essence.
-
Pineapple Sorbet: This light, refreshing sorbet brings a tropical sweetness that harmonizes beautifully with the cheesecake. It’s a fun, vibrant finish to any meal!
Orange Creamsicle Cheesecake Recipe FAQs
What type of oranges should I use for the cheesecake?
I recommend using fresh, ripe navel oranges for their sweet, juicy flavor. Look for oranges that are firm and free from dark spots. A good rule of thumb is to choose ones that feel heavy for their size, indicating juiciness.
How should I store the cheesecake after it’s been made?
Store your Orange Creamsicle Cheesecake in the refrigerator, covered with plastic wrap or in an airtight container. It will stay fresh for up to 3 days. Keeping it well-covered is key to maintaining its creamy texture and vibrant flavors.
Can I freeze Orange Creamsicle Cheesecake?
Absolutely! If you’d like to freeze your cheesecake, wrap it tightly in plastic wrap and aluminum foil to prevent freezer burn. It can be kept in the freezer for up to 2 months. When you’re ready to enjoy it, simply thaw it in the refrigerator overnight. This helps preserve its delightful flavors.
What should I do if my cheesecake doesn’t set properly?
If your cheesecake isn’t setting as expected, it might be due to the gelatin not being used correctly. Make sure to bloom the gelatin in cold water first, then gently heat it just until melted. If the problem persists, consider putting it back in the refrigerator for additional time; sometimes, it just needs a little more chill to firm up!
Is this cheesecake suitable for those with dairy allergies?
To make this Orange Creamsicle Cheesecake dairy-free, you can substitute cream cheese with a dairy-free alternative like cashew cream or a vegan cream cheese. Additionally, use coconut cream instead of heavy whipping cream. This way, everyone can enjoy this delightful dessert!
How far in advance can I make this cheesecake?
You can prepare this No-Bake Orange Creamsicle Cheesecake up to two days in advance, making it perfect for gatherings. Just make sure to keep it covered in the refrigerator, allowing the flavors to meld beautifully while it sets overnight for optimal texture.

Delightful Orange Creamsicle Cheesecake for Easy Entertaining
Ingredients
Equipment
Method
- In a medium bowl, combine graham cracker crumbs with melted unsalted butter until well mixed. Press this mixture firmly into the bottom of a 9-inch springform pan using the back of a measuring cup or your hands, creating an even layer. Place the crust in the refrigerator while you prepare the filling to help it set.
- Take the cream cheese out of the refrigerator and allow it to soften at room temperature for about 30 minutes. Once it's soft, transfer it to a large mixing bowl and beat with an electric mixer on medium speed until the consistency is smooth and creamy.
- Gradually sift powdered sugar into the softened cream cheese while mixing on low speed. Continue to beat the mixture until the sugar is fully incorporated and the filling is smooth, which should take about 1-2 minutes.
- Add heavy whipping cream, fresh orange juice, orange zest, and vanilla extract to the cream cheese mixture. Using an electric mixer, whip on high speed until the mixture becomes fluffy and holds soft peaks, about 2-3 minutes.
- In a small bowl, sprinkle unflavored gelatin over cold water and let it sit for about 5 minutes until it blooms and softens. After blooming, gently heat the gelatin mixture in the microwave for 10-15 seconds, or until just melted.
- Remove the melted gelatin from the microwave and let it cool slightly. Gradually stir the warm gelatin into the cheesecake filling mixture, ensuring it's fully incorporated without any lumps.
- Take your prepared crust out of the refrigerator and pour the creamy filling over it. Use a spatula to spread the filling evenly across the top of the crust. Gently tap the pan on the counter to release any air bubbles.
- Cover the springform pan with plastic wrap or aluminum foil and place it in the refrigerator for at least 4 hours, or preferably overnight.
- Once fully chilled and set, carefully run a knife around the edges of the springform pan to loosen the cheesecake. Gently release the springform clasp and remove the sides of the pan.
- Before serving, feel free to decorate your cheesecake with additional orange slices or a sprinkle of orange zest on top for an extra pop of color. Slice into wedges and enjoy!
Leave a Reply