
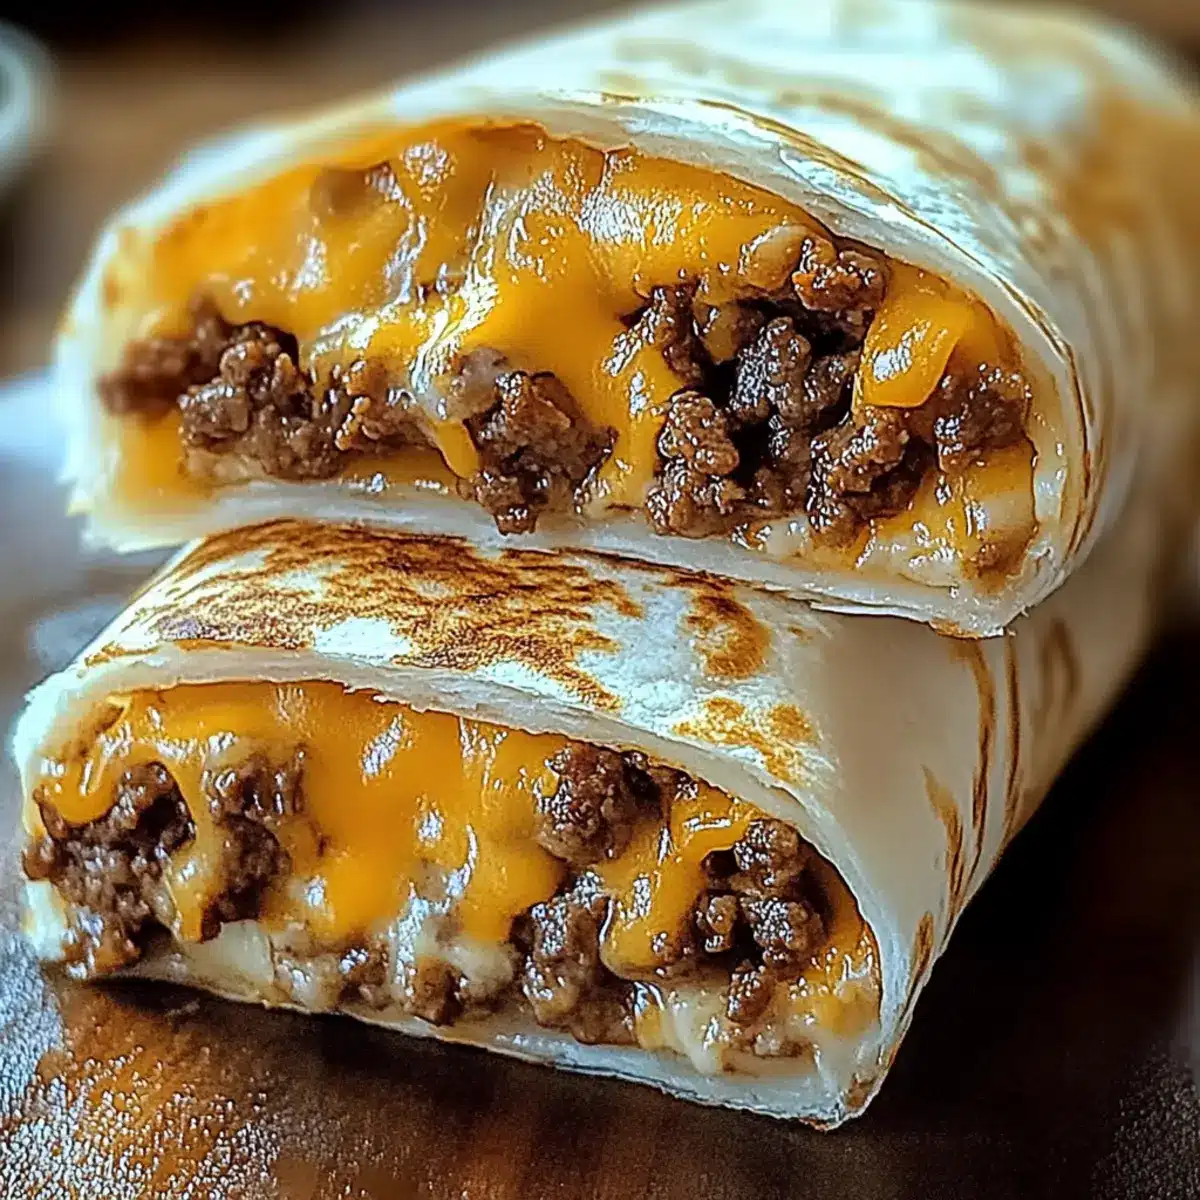
In the chaos of a busy week, there’s a little joy found in the familiar comfort of a burrito, especially when it’s a Grilled Cheese Burrito! This recipe transforms the classic grilled cheese into something fun and exciting, wrapping melty cheddar and flavorful fillings in a warm tortilla. What I love most is that it comes together in under 30 minutes and is wonderfully customizable—perfect for pleasing picky eaters or trying out new flavors. You can easily switch up ingredients to suit anyone’s dietary needs, whether that means going vegetarian, dairy-free, or adding your favorite protein like grilled chicken or turkey. With every bite, you’ll be left craving the simple joys of home-cooked meals. Ready to take your taste buds on a creamy, cheesy adventure? Let’s dive in!
Why is Grilled Cheese Burrito a Must-Try?
Quick and Easy: This recipe whips up in under 30 minutes, making it a weeknight lifesaver.
Customization Galore: With options for vegetarian, dairy-free, or various meats, everyone can enjoy their perfect burrito!
Kid-Friendly Delight: The cheesy, flavorful components make it a surefire hit with kids and adults alike. Pair it with a fresh salad for a balanced meal.
Savory Comfort: Imagine warm tortillas embracing melted cheese and savory fillings—delicious and satisfying!
Meal Prep Friendly: Make ahead by prepping the beef and rice, ensuring you’re always ready for a quick and tasty dinner.
Unique Texture: Each bite offers a crispy exterior cradling gooey goodness, bridging the best of taco and grilled cheese worlds! Embrace this fun twist that’s sure to become a family favorite.
Grilled Cheese Burrito Ingredients
For the Filling
• Ground Beef – Provides protein and flavor; can substitute with turkey or plant-based options for a lighter or vegetarian dish.
• Taco Seasoning – Adds spice and depth to the beef; make your own for a healthier option.
• Cooked White Rice – Adds bulk and texture; can substitute with brown rice or quinoa for extra nutrients.
• Sour Cream – Adds creaminess and tang; yogurt or dairy-free alternatives can be used.
• Nacho Cheese Sauce – Delivers gooey texture and flavor; homemade or vegan cheese can be substituted based on dietary preference.
• Shredded Cheddar Cheese – Provides melty richness; mix with mozzarella or use a Mexican blend for more flavor.
• Shredded Mozzarella Cheese – Enhances creaminess; can be omitted or replaced with lower-fat cheese.
• Chipotle Sauce – Offers heat and smokiness; adjust based on personal spice preference.
For the Wrap
• Flour Tortillas – Wrapper for the burrito; whole wheat or gluten-free tortillas are good alternatives.
• Butter or Oil – For grilling the burrito; olive oil or non-stick spray for a healthier option.
Step‑by‑Step Instructions for Irresistible Easy Grilled Cheese Burrito
Step 1: Cook the Beef
In a large skillet, heat over medium heat and add 1 pound of ground beef. Cook for 8–10 minutes until browned, breaking it apart with a spoon. Once cooked, drain excess grease, sprinkle in taco seasoning, and stir in a splash of water. Let it simmer for another 5 minutes, allowing the flavors to meld beautifully.
Step 2: Warm Tortillas
While the beef is simmering, prepare your tortillas. Heat 4 flour tortillas in a dry skillet over medium-low heat or microwave them for about 30 seconds until soft and pliable. This step ensures your tortillas can easily wrap around the delicious fillings without tearing, making your Grilled Cheese Burrito a success.
Step 3: Assemble the Burrito
Now it’s time to bring the flavors together! On each warm tortilla, layer a generous scoop of cooked rice, the seasoned beef, a drizzle of nacho cheese sauce, a spoonful of sour cream, and a touch of chipotle sauce. Sprinkle both shredded cheddar and mozzarella cheese on top, then carefully fold in the edges and roll tightly to create your burrito.
Step 4: Grill the Burrito
Preheat a skillet over medium heat and add butter or a splash of oil. Once hot, place the burrito seam-side down and grill for 3–4 minutes until golden and crispy on that side. Gently flip the burrito with a spatula and grill the other side for 3–4 minutes, achieving a perfect crispy exterior that seals in the melty goodness.
Step 5: Serve
Once both sides of the Grilled Cheese Burrito are beautifully crispy and golden brown, remove it from the skillet. Let it cool for a minute before slicing it in half to reveal the gooey cheese and savory fillings. Serve warm with additional chipotle sauce or fresh guacamole for that extra touch of flavor!
Expert Tips for Grilled Cheese Burrito
Preheat the Skillet: Ensure your skillet is hot before grilling to achieve a crunchy texture on the burrito.
Wrap Tight: Roll the burrito tightly and tuck in the edges to prevent fillings from spilling out during grilling.
Adjust Sauces: If using homemade sauces, taste and tweak the spice level to perfectly match your family’s preferences.
Avoid Sogginess: When substituting ingredients, balance moisture levels carefully. Use less sour cream or cheese to keep the burrito from becoming too wet.
Experiment with Fillings: Don’t hesitate to mix and match fillings based on what you have on hand—create your unique Grilled Cheese Burrito!
What to Serve with Easy Grilled Cheese Burrito
Create a delightful meal experience around the comforting flavor bomb of the Easy Grilled Cheese Burrito, and you’ll have the family raving!
- Guacamole: The creamy texture complements the crunch of the burrito while adding a fresh, zesty dimension.
- Chipotle Sauce: For those who crave spice, a drizzle enhances the burrito’s smoky flavor and adds an exciting kick. Pair it with cool sour cream for balance.
- Fresh Salsa: Bright and tangy, fresh salsa brings a burst of flavor that contrasts beautifully with the richness of the cheese and beef.
For a refreshing side, consider serving a crisp garden salad. The crunch of fresh greens and light dressing complements the heaviness of the burrito, creating a harmonious plate. Top the salad with avocado slices for an added creamy twist!
- Corn on the Cob: Sweet, buttery corn provides a lovely contrast in sweetness and texture alongside the savory burrito.
- Stuffed Bell Peppers: Offering a colorful touch, these tender peppers can be filled with rice, beans, and cheese—mirroring the burrito but in a different form!
To finish off the meal, indulge in a chocolate chip cookie. The warm, gooey sweetness contrasts perfectly with the savory burrito, making it a delightful end to your culinary adventure.
How to Store and Freeze Grilled Cheese Burrito
Fridge: Store leftovers in an airtight container for up to 3 days. Reheat in a skillet to maintain that delightful crispy texture.
Freezer: Wrap individual burritos in foil and freeze for up to 1 month. For a quick meal, reheat in the oven at 350°F for about 15-20 minutes.
Make-Ahead: Prepare the beef filling and rice mixture in advance, keeping them refrigerated for up to 3 days. Assemble with tortillas just before grilling for optimal freshness.
Reheating: When reheating, avoid the microwave if you want a crispy exterior; use a skillet or oven instead for the best results.
Grilled Cheese Burrito Variations & Substitutions
Feel free to mix things up and create your ideal Grilled Cheese Burrito for a delightful twist on this comfort classic.
-
Vegetarian: Switch out ground beef for black beans or lentils, creating a protein-rich and delicious meat-free option. Imagine the hearty feel of beans wrapped in melty cheese—satisfying and nutritious!
-
Dairy-Free: Opt for vegan cheese and sour cream alternatives to enjoy a creamy, indulgent burrito without the dairy. With dairy-free options, everyone can join in the cheesy fun!
-
Gluten-Free: Use gluten-free tortillas to cater to those with gluten sensitivities or preferences. This keeps the burrito accessible while still delivering comfort wrapped in warm goodness.
-
Extra Veggies: Enhanced nutrition and flavor can come from adding grilled peppers, onions, or spinach. Layer in your favorite vegetables to elevate the taste and texture—each bite will be a vibrant surprise!
-
Heat Level: Adjust the spiciness by varying the chipotle sauce; mild for less heat or extra for spice lovers. Finding the right balance is crucial for a family-friendly feast!
-
Texture Boost: For an added crunch, toss in some crushed tortilla chips right before wrapping the burrito. This delightful surprise creates an exciting variation—a perfect blend of soft and crispy!
-
Different Cheeses: Experiment with cheese combinations! Swap cheddar for pepper jack or gouda for a smoky twist. The right cheese pairing can make all the difference in achieving that ooey-gooey texture.
-
Flavor Fusion: Consider adding BBQ sauce or teriyaki glaze for a unique and flavorful twist on the classic burrito. These new layers of flavor will ignite your taste buds and give a fun twist to your dinner routine!
For inspiration, try pairing your burrito with some Guacamole or a fresh and zesty House Salad to make your meal even more satisfying!
Make Ahead Options
These Easy Grilled Cheese Burritos are perfect for busy home cooks looking to save time during the week! You can prepare the beef filling and rice mixture up to 3 days in advance; simply store them in an airtight container in the refrigerator to maintain freshness. If you’d like to assemble the burritos beforehand, layer the fillings inside the tortillas, wrap them tightly, and refrigerate them for up to 24 hours. For heating, just grill them straight from the fridge for a crispy finish. This step ensures that you can enjoy delightful, melty goodness with minimal effort on hectic nights, delivering a comforting meal in no time!
Grilled Cheese Burrito Recipe FAQs
How do I choose ripe ingredients for my Grilled Cheese Burrito?
Selecting ripe ingredients is vital for flavor! For your tomatoes, look for those with a rich, vibrant color and a slight give when squeezed. If using avocados, choose those that are slightly soft but still firm, as overly soft ones can be overripe. I always recommend checking for any dark spots or blemishes, which can indicate that the ingredient may be past its prime.
What’s the best way to store leftover Grilled Cheese Burrito?
To keep your Grilled Cheese Burrito fresh, store leftovers in an airtight container in the fridge for up to 3 days. When reheating, doing so in a skillet helps maintain that deliciously crispy texture. Simply heat on medium for about 2-3 minutes per side until warmed through.
Can I freeze Grilled Cheese Burrito?
Absolutely! To freeze, wrap each assembled burrito tightly in foil and then place them in a freezer-safe bag. They can be frozen for up to 1 month. When you’re ready to enjoy one, preheat your oven to 350°F (175°C), remove the foil, place the burrito on a baking sheet, and heat for about 15-20 minutes, which will restore that perfect crispy exterior.
What should I do if my burrito is too soggy?
A soggy burrito can often be due to excess moisture from ingredients. To troubleshoot, make sure to evenly distribute the filling, using smaller amounts of wet ingredients like sour cream or sauces. Also, try to drain any excess liquid from cooked rice or beans. You can also grill the burrito slightly longer on a lower heat to help evaporate any residual moisture and achieve that crispy texture.
Are there any dietary considerations for the ingredients?
Yes, you can easily adapt the Grilled Cheese Burrito for various dietary needs! For a vegetarian option, swap the ground beef for black beans or lentils. If you need it to be dairy-free, I highly recommend using plant-based cheese and sour cream substitutes. For those with gluten sensitivities, opt for gluten-free tortillas. Always check ingredient labels to ensure they align with your dietary requirements.
How can I make my Grilled Cheese Burrito even more delicious?
For an extra flavor kick, consider adding fresh herbs like cilantro or green onions to your filling. You can also try different spices in your taco seasoning or explore other cheese blends to suit your taste. Personalizing your burrito lets you discover what makes it unique to your family’s palate!
Melty Grilled Cheese Burrito: A Quick Comfort Meal Twist
Ingredients
Equipment
Method
- In a large skillet, heat over medium heat and add 1 pound of ground beef. Cook for 8–10 minutes until browned, breaking it apart with a spoon. Drain excess grease, sprinkle in taco seasoning, and stir in a splash of water. Let it simmer for another 5 minutes.
- Heat 4 flour tortillas in a dry skillet over medium-low heat or microwave them for about 30 seconds until soft and pliable.
- On each warm tortilla, layer a scoop of cooked rice, the seasoned beef, nacho cheese sauce, sour cream, and chipotle sauce. Sprinkle with cheddar and mozzarella cheese, then fold and roll tightly to create the burrito.
- Preheat a skillet over medium heat and add butter or oil. Once hot, place the burrito seam-side down and grill for 3–4 minutes until golden and crispy. Flip and grill the other side for another 3–4 minutes.
- Remove from skillet once both sides are crispy. Let it cool for a minute before slicing in half to serve warm with chipotle sauce or guacamole.
Leave a Reply