
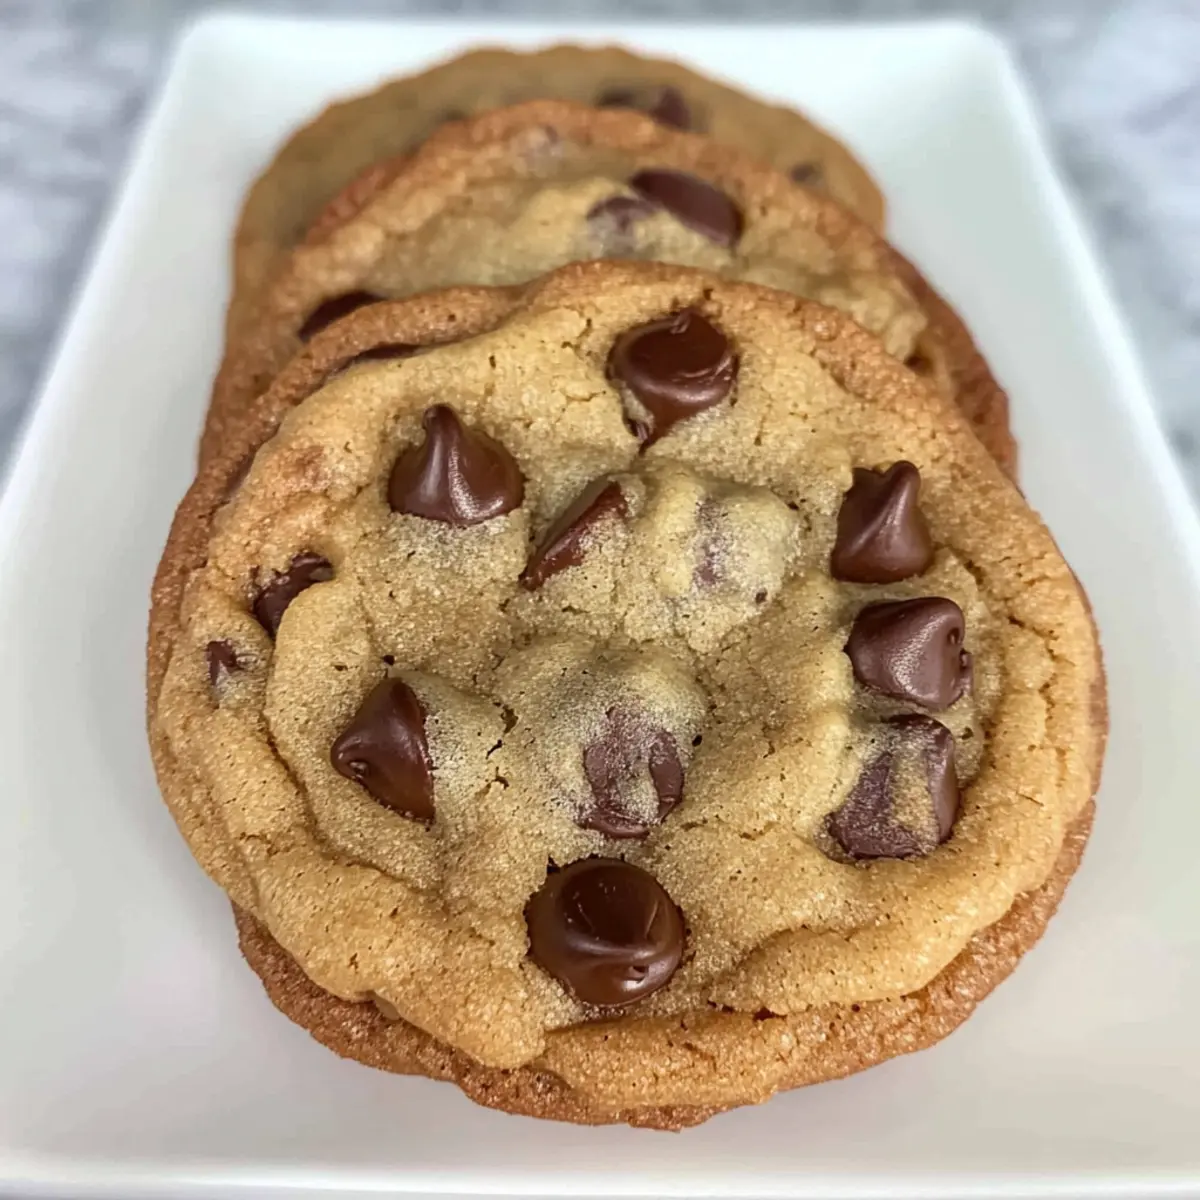
The distinctly nutty aroma of brown butter filled my kitchen, instantly whisking me away to a cozy bakery where the sweet scent of freshly baked cookies beckons. Today, I’m excited to share my favorite Brown Butter Chocolate Chip Cookies with you, a delightful twist on a classic treat. These cookies boast golden, crispy edges, while the centers remain gooey and melty—everything a cookie lover could ever dream of. Not only are they a crowd-pleaser, ready to impress your family and friends, but they also come together in just over an hour. You won’t be able to resist sneaking a warm cookie (or two) straight from the oven! Curious about how to achieve that perfect balance of texture and flavor? Let’s dive into this delectable journey together!
What Makes These Cookies So Special?
Unique Flavor: The rich, nutty taste of brown butter elevates these cookies beyond the ordinary, creating a complexity that will leave you craving more.
Quick and Easy: With just over an hour to whip up a batch, you can satisfy your sweet tooth without dedicating your entire day to baking.
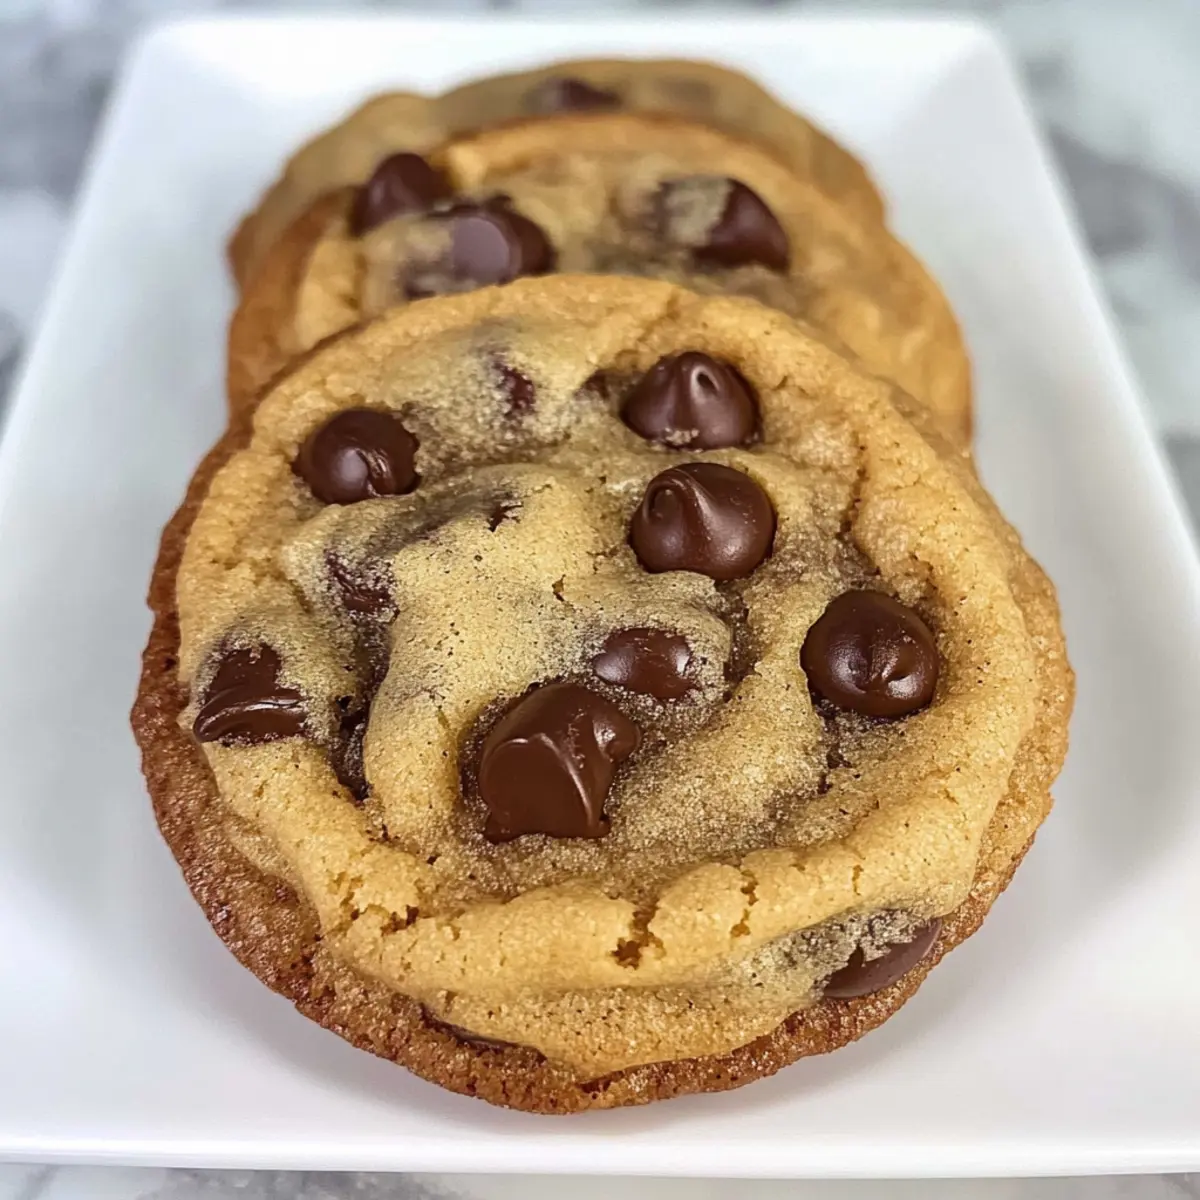
Perfectly Balanced: Expect crispy edges and a gooey center that creates an irresistible combination—everyone will be asking for seconds!
Crowd-Pleaser: Whether it’s a family gathering or a casual get-together, these cookies are sure to steal the show and please guests of all ages.
For those seeking more comforting treats, don’t miss my recipes for Oatmeal Chocolate Chip and Chocolate Chip Cookies that are equally delightful!
Versatile Varieties: Feel free to swap in your favorite chocolate, nuts, or even experiment with gluten-free options, allowing for endless delicious possibilities.
Brown Butter Chocolate Chip Cookies Ingredients
For the Dough
• Butter – 1 ¼ cups (280 grams); browned for a rich, nutty flavor that enhances the cookie’s taste.
• Granulated Sugar – ¾ cup (150 grams); adds sweetness and helps achieve the perfect cookie texture.
• Brown Sugar – 1 cup (200 grams); packed firmly to deliver moisture and a delicious toffee flavor.
• Eggs – 2 large; these are the binding agents that add richness and help achieve a soft center.
• Vanilla Extract – 1 teaspoon; enhances sweetness, bringing depth to your Brown Butter Chocolate Chip Cookies.
• All-Purpose Flour – 2 ¾ cups (357 grams); be sure to measure accurately for the right structure and chewiness.
• Salt – ½ teaspoon; enhances flavor—consider increasing to ¾ teaspoon if using unsalted butter.
• Baking Soda – 2 teaspoons; this leavening agent helps your cookies rise just right.
• Semisweet Chocolate Chips – 2-2 ½ cups (360-480 grams); use a mix for added texture and sweetness in each bite.
Optional Toppings
• Flaked Sea Salt – for sprinkling on top before baking; it elevates the flavor profile and adds a delightful crunch.
With these ingredients on hand, you’re well on your way to baking a batch of Brown Butter Chocolate Chip Cookies that everyone will adore!
Step‑by‑Step Instructions for Brown Butter Chocolate Chip Cookies
Step 1: Brown the Butter
In a medium-large saucepan over medium-high heat, melt 1 ¼ cups of butter, stirring frequently. Continue to cook until the butter turns a deep honey color and emits a nutty aroma, approximately 5–7 minutes. Remove from heat and allow it to cool to room temperature until it solidifies again. This step enhances the rich flavor of your Brown Butter Chocolate Chip Cookies.
Step 2: Preheat the Oven
While your browned butter cools, preheat your oven to 375°F (190°C). Prepare your baking sheets by lightly spraying them with nonstick spray or lining them with parchment paper. This will keep your cookies from sticking and ensure an even bake, leading to deliciously soft and crispy edges in your Brown Butter Chocolate Chip Cookies.
Step 3: Cream the Ingredients
In a large mixing bowl, combine your cooled brown butter with ¾ cup granulated sugar and 1 cup firmly packed brown sugar. Cream these together with a hand mixer on medium speed for about 1 minute, until the mixture is smooth. Add in 2 large eggs and 1 teaspoon of vanilla extract, and continue mixing for another 2–3 minutes until it becomes pale and fluffy, creating a velvety base for your cookies.
Step 4: Mix the Dry Ingredients
Gradually sift in 2 ¾ cups of all-purpose flour, along with 2 teaspoons of baking soda and ½ teaspoon of salt. Using a spatula, gently fold the dry ingredients into the wet mixture until just combined; be careful not to overmix. This technique ensures your Brown Butter Chocolate Chip Cookies maintain that perfect soft texture you crave.
Step 5: Add the Chocolate Chips
Once the dough is mixed, gently fold in 2 to 2 ½ cups of semisweet chocolate chips. This will add melty sweetness and delightful texture to your cookies. Ensure an even distribution of chocolate throughout the dough, setting you up for a rich chocolate experience in every bite of your Brown Butter Chocolate Chip Cookies.
Step 6: Shape the Cookie Dough
Using a cookie scoop or your hands, form the cookie dough into roughly ¼ cup balls (about 68 grams each). Place these on the prepared baking sheets, making sure to leave ample space between each ball to allow for spreading. Aim to have about 6-8 cookies per baking sheet to ensure even baking and to achieve that crispy edge and gooey center in your Brown Butter Chocolate Chip Cookies.
Step 7: Bake the Cookies
Slide the baking sheets into your preheated oven and bake for 8–10 minutes or until the edges are golden-brown, while the centers remain soft and slightly underbaked. This will yield the ideal texture contrast. Keep an eye on them to prevent burning, as every oven may vary slightly in temperature.
Step 8: Cool and Enjoy
After baking, let your cookies cool on the sheet for about 2–3 minutes before transferring them to a wire rack. This brief cooling period allows the centers to set while still remaining perfectly gooey. Once cooled, grab a warm Brown Butter Chocolate Chip Cookie, and get ready for a delightful experience with each bite!
What to Serve with Brown Butter Chocolate Chip Cookies?
Treat your taste buds to a delightful experience that turns simple cookies into a complete feast.
- Cold Milk: A classic pairing that enhances the cookies’ rich flavors, making each bite a soothing experience.
- Coffee or Espresso: The boldness of coffee complements the sweet, nutty taste of the cookies, creating a delightful afternoon pick-me-up.
- Vanilla Ice Cream: Serve a scoop alongside warm cookies for an indulgent dessert that melts in your mouth, creating a heavenly combination.
For an aromatic twist, consider pairing with a spiced chai. The warmth of the spices creates comforting harmony with the sweetness of your cookies.
- Chocolate Dipping Sauce: A rich, warm drizzle over your cookies adds an extra layer of decadence, perfect for those with a sweet tooth!
- Raspberry or Strawberry Jam: The tartness of jam counterbalances the sweetness of the cookies, adding a beautiful contrast that will elevate your snacking experience.
- Fruit Salad: Fresh seasonal fruits will bring lightness to the table and complement the cookie’s richness with vibrant flavors and textures.
How to Store and Freeze Brown Butter Chocolate Chip Cookies
Room Temperature: Store cookies in an airtight container at room temperature for up to 1 week to maintain their soft and gooey texture.
Fridge: If you’d like to keep them fresh a bit longer, you can refrigerate the cookies in an airtight container for up to 2 weeks, but this may change their texture slightly.
Freezer: For longer storage, freeze cookies in a single layer on a baking sheet until solid, then transfer to a freezer-safe bag or container. They can be frozen for up to 3 months.
Reheating: To enjoy cookies straight from the freezer, simply bake at 350°F (175°C) for about 5–7 minutes, or until warmed through. Perfect for when the craving strikes!
Brown Butter Chocolate Chip Cookies Variations
Feel free to explore these delicious twists that will make your Brown Butter Chocolate Chip Cookies even more delightful!
-
Dark Chocolate: Swap semisweet chocolate chips for dark chocolate chips for a richer, more intense flavor. The deep notes of dark chocolate contrast beautifully with the sweetness of the cookie.
-
Nutty Delight: Add ½ cup of chopped walnuts or pecans to the dough for a satisfying crunch and extra flavor. Nuts not only enhance texture but also give a wonderful earthiness that complements the chocolate.
-
Gluten-Free: Substitute the all-purpose flour for a gluten-free blend to cater to dietary needs. Just be sure to check that your baking soda is also gluten-free!
-
Salted Caramel: Incorporate chunks of salted caramel into the cookie dough for a delectable surprise in every bite. The gooey caramel melts beautifully, adding a sweet and salty kick.
-
Cinnamon Twist: Add 1 teaspoon of ground cinnamon to the flour mixture for a warm, cozy flavor. The cinnamon pairs nicely with the browning butter and chocolate.
-
Spicy Kick: If you like a little heat, add a pinch of cayenne pepper to the batter. This unexpected twist elevates the sweetness and creates an intriguing flavor profile.
-
Vanilla Bean: Replace the vanilla extract with seeds from a vanilla bean for a more luxurious, aromatic taste. Each bite will reflect pure decadence!
-
Oatmeal Chocolate Chip: Mix in 1 cup of rolled oats for a heartier texture reminiscent of oatmeal cookies. The oats provide chewiness and make these cookies even more satisfying.
Now that you have these variations, you’re on your way to creating personalized Brown Butter Chocolate Chip Cookies that everyone will enjoy! If you’re curious about more cookie recipes, check out my delightful Brown Butter Chocolate Chip Cookies or classic Chocolate Chip Cookies!
Make Ahead Options
These Brown Butter Chocolate Chip Cookies are perfect for meal prep enthusiasts! You can make the cookie dough up to 3 days in advance by tightly wrapping it in plastic wrap or placing it in an airtight container in the refrigerator. When ready to bake, simply scoop the dough onto a prepared baking sheet and let it sit at room temperature for about 15-20 minutes to soften slightly before baking. For an even richer flavor, consider letting the dough rest overnight. Just remember to monitor baking time, as chilled dough often requires a minute or two longer in the oven. This way, you’ll enjoy fresh, warm cookies with the delightful texture and flavor you love, all while saving precious time on busy weeknights!
Expert Tips for Brown Butter Chocolate Chip Cookies
-
Chill the Butter: Always let the browned butter cool and solidify before mixing. Liquid butter can lead to flat and crispy cookies instead of the fluffy texture you desire.
-
Measure Flour Accurately: Use a kitchen scale for precise measurements, especially with flour. Incorrect amounts can result in tough cookies; you want that perfect balance in these Brown Butter Chocolate Chip Cookies.
-
Rest the Dough: Allow your cookie dough to chill in the refrigerator for at least an hour or overnight. This enhances the flavor and texture, leading to a richer bite.
-
Large Cookie Size: Don’t shy away from making large cookies—use about 4 tablespoons of dough per cookie. This keeps the center soft and gooey, creating that delightful texture contrast.
-
Finishing Touch: Sprinkle flaked sea salt on top of your cookies just before baking. It adds a touch of sophistication and heightens the flavor profile.
Brown Butter Chocolate Chip Cookies Recipe FAQs
What should I look for when selecting butter for the recipe?
Use high-quality unsalted or salted butter, depending on your preference. Unsalted butter allows you to control the saltiness of the cookies, while salted butter brings out richer flavors. For the best results, ensure it’s fresh and has no dark spots or signs of spoilage, which can compromise the taste.
How do I store my Brown Butter Chocolate Chip Cookies?
Store your cookies in an airtight container at room temperature for up to 1 week. This helps maintain their deliciously soft and gooey center. To keep them fresh for longer, you can refrigerate them in an airtight container for up to 2 weeks, though this may slightly alter their texture.
Can I freeze my cookies, and how should I do it?
Absolutely! To freeze, place your cookies in a single layer on a baking sheet and freeze until solid. Then transfer them to a freezer-safe bag or container, where they can last for up to 3 months. When you’re ready to enjoy them, simply bake at 350°F (175°C) for 5–7 minutes until warmed through.
Why are my cookies hard instead of soft?
If your Brown Butter Chocolate Chip Cookies turn out hard, there may have been too much flour added, which can happen if it’s not measured accurately. Additionally, be cautious not to overmix the dough after adding the flour, as overmixing can develop gluten, making for tougher cookies. Always ensure the browned butter is cooled and re-solidified to create that luscious melt-in-your-mouth experience!
Can these cookies be made gluten-free?
Yes, you can make your Brown Butter Chocolate Chip Cookies gluten-free by substituting half or all of the all-purpose flour with a gluten-free flour blend. Make sure the blend contains xanthan gum, or add a bit yourself to help bind the cookies and achieve that perfect texture.
Are there any common allergies I should consider?
When sharing these cookies, keep in mind potential allergies to common ingredients like eggs, wheat, and dairy. For egg substitutes, you might try flax eggs (1 tablespoon of flaxseed meal mixed with 2.5 tablespoons of water per egg). If you need to cater to nut allergies, ensure all ingredients are nut-free, especially when adding any optional toppings or mix-ins.
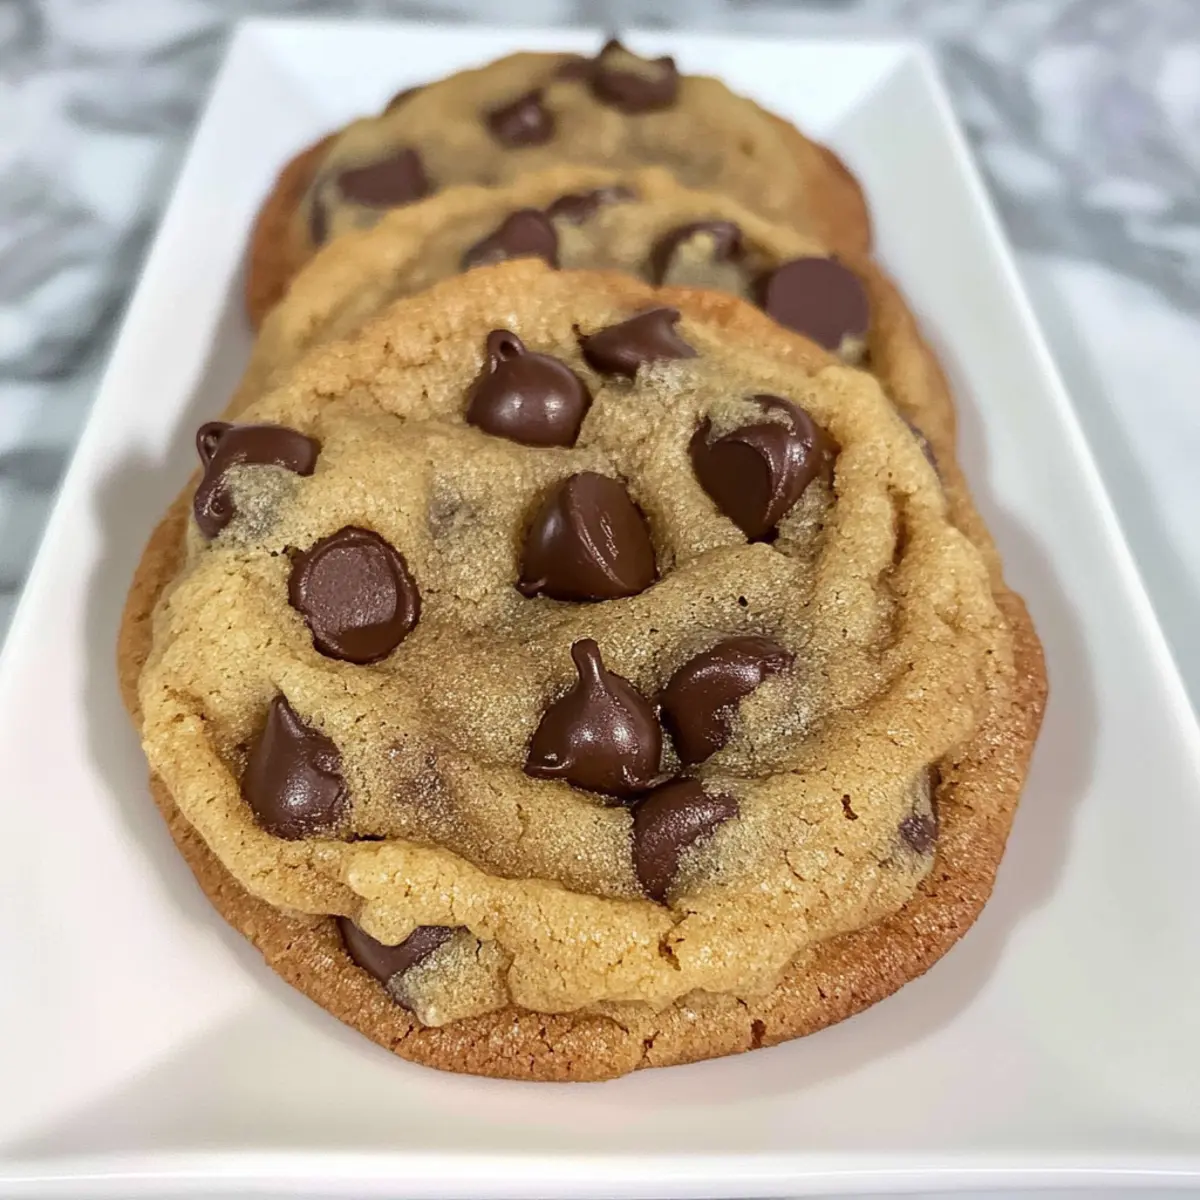
Brown Butter Chocolate Chip Cookies That Melt in Your Mouth
Ingredients
Equipment
Method
- Melt butter in saucepan, stirring until deep honey color, about 5–7 minutes. Cool to solidify.
- Preheat oven to 375°F (190°C) and prepare baking sheets.
- Combine cooled butter with sugars, blend until smooth, then mix in eggs and vanilla.
- Sift in flour, baking soda, and salt. Fold until just combined.
- Fold in chocolate chips until evenly distributed.
- Form dough into ¼ cup balls and place on baking sheets, leaving space to spread.
- Bake for 8–10 minutes or until edges are golden-brown and centers soft.
- Cool on the sheet for 2–3 minutes before transferring to a wire rack.
Leave a Reply